
Quick Answer: The best kitchen cabinet organization ideas combine pull-out shelves for deep cabinets, lazy susans for corners, vertical racks for baking sheets and cutting boards, drawer dividers for utensils, stackable shelf risers, clear labeled containers for dry goods, and hooks inside cabinet doors for small tools. Group by category, store frequently-used items at eye level, and use baskets or bins to corral similar items.
You open the corner cabinet and three lids slide out, the cutting boards are wedged sideways behind the baking sheets, and somewhere in the back is a saucepan you have not seen since 2023. This is the cabinet that ate ten percent of your storage and gave it back as chaos.
Kitchen cabinet organization is the cheapest, fastest renovation you can do in a weekend with no contractor and no permit, because almost every fix is an insert that drops into the cabinet you already have. A pull-out shelf turns a deep base cabinet from a black hole into a usable drawer. A lazy Susan rescues the dead corner. A set of vertical dividers finally separates the cutting boards from the baking sheets. By Sunday night the kitchen works differently.
Want every cabinet door to open to organized clarity instead of avalanche risk?
The Aesthetic Apartment Makeover Guide walks through every room with budget-friendly ideas. $17 now, soon $27.

Recommended Kitchen Cabinet Organization Essentials
The pieces that anchor cabinet organization, pull-out shelves, lazy susans, drawer dividers, stackable risers, and labeled containers.


Recommended blogs to read:
- Kitchen counter organization ideas
- Kitchen counter decor ideas
- Small apartment kitchen storage ideas
- Kitchen cabinet color ideas
- Modern kitchen cabinet design
Deep Cabinet and Corner Solutions
1. Use pull-out shelves for easy access to items
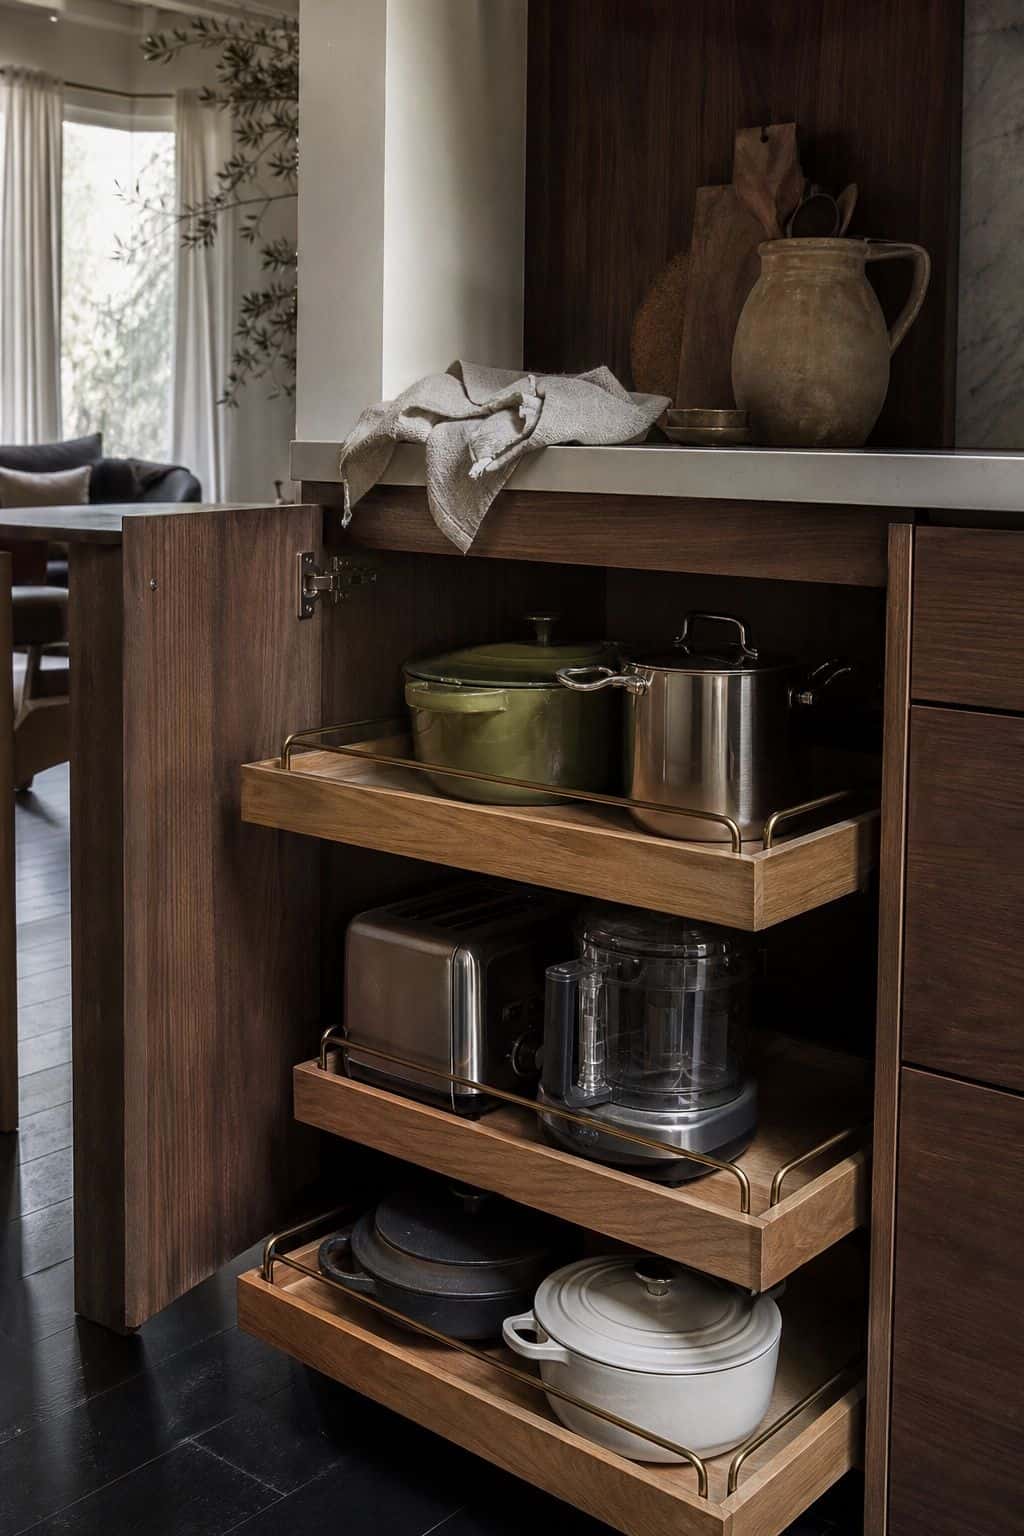


Pull-out shelves (sliding wire baskets or wooden trays on glides) transform deep base cabinets from dark caves into accessible storage. Items at the back become as reachable as items at the front, doubling effective cabinet capacity.
Custom-fit pull-outs run $50-150 per shelf from Rev-A-Shelf, ShelfGenie, or Custom Cabinet Outlet. DIY versions from $20-40 IKEA Maximera or Amazon pull-outs work for standard cabinet sizes (typically 12-30 inch widths).
Measure the inside opening, not the door, since the hinges steal an inch or two on each side and a too-wide shelf will not clear them. Start with the cabinet under the stove or sink where you store the heaviest pots, because that is where dragging things out by hand is the most annoying. A line of grippy shelf liner on top keeps a stack of pans from sliding to the back every time you pull the tray.
Read more: Top 15 Open Cabinet Kitchen Decor Ideas to Style Your Shelves
2. Install lazy Susans in corner cabinets
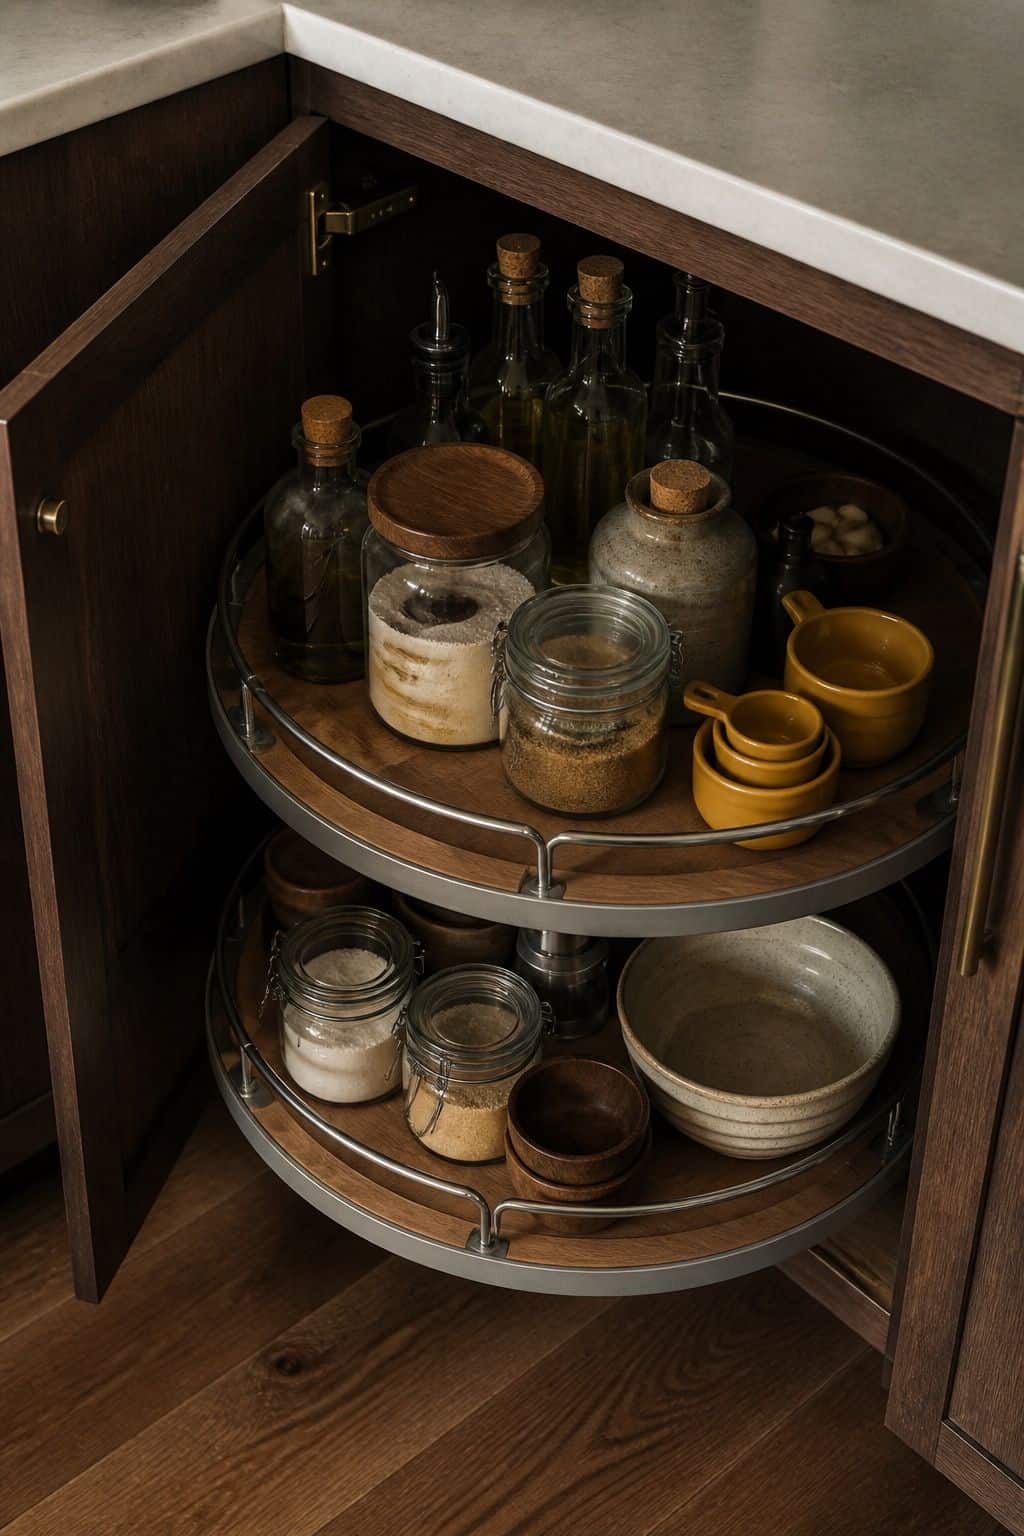


Corner cabinets lose 30-50 percent of their volume without a lazy Susan because reaching items at the back requires moving everything in front. A two-tier lazy Susan (12-18 inches diameter) makes every item accessible with a spin.
Free-standing versions sit on a cabinet shelf; built-in versions replace standard shelving with kidney or pie-cut rotating shelves. Brands like Rev-A-Shelf, Hafele, and KraftMaid all make corner-specific lazy Susans at $50-300.
Load it by category so one spin brings the whole baking group or the whole oils group to the front, and keep a raised lip in mind so jars do not fly off mid-turn. If the cabinet shelf sits too low for tall bottles, many free-standing units let you pop off the top tier and run it as a single deep rotation. A quick wipe of food-safe oil on a sticky bearing usually fixes a slow spinner without any tools.
Read more: Top 15 Kitchen Corner Cabinet Ideas to Maximize Every Inch
3. Use pull-out trash and recycling bins
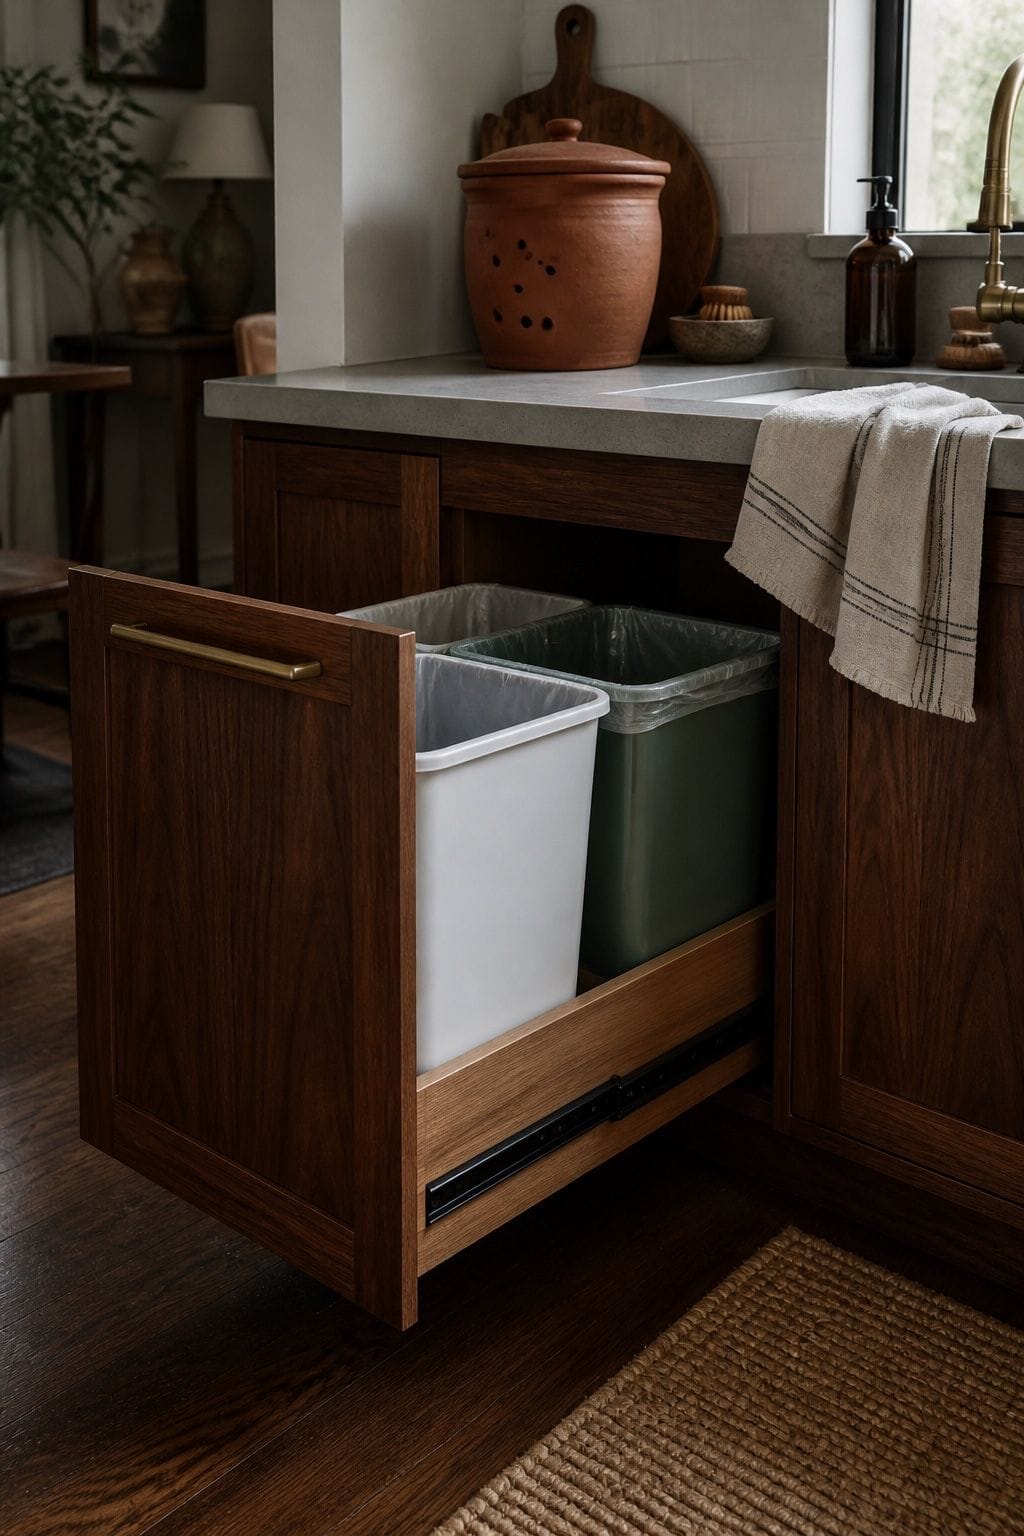


Pull-out trash and recycling bins hidden behind a cabinet door look cleaner than freestanding bins on the floor. Most installations have one bin for trash and one for recycling, with capacities of 35-50 quarts each.
Pre-built pull-out frames from Rev-A-Shelf or Hafele install in 30-45 minutes. Match the cabinet door height for smooth integration. Some include slow-close hinges for the soft-close effect.
Pick the cabinet closest to your main prep zone so scraping a cutting board into the bin is one short turn, not a walk across the kitchen. Liners that grip the rim make bag changes faster, and tucking a small box of spare bags right beside the bins means you never hunt for one. A pull-out caddy on the door above the bins is a handy spot for the dish brush and cleaning spray, keeping the whole cleanup zone in one place.
Drawer Organization
4. Add drawer dividers for utensils and tools
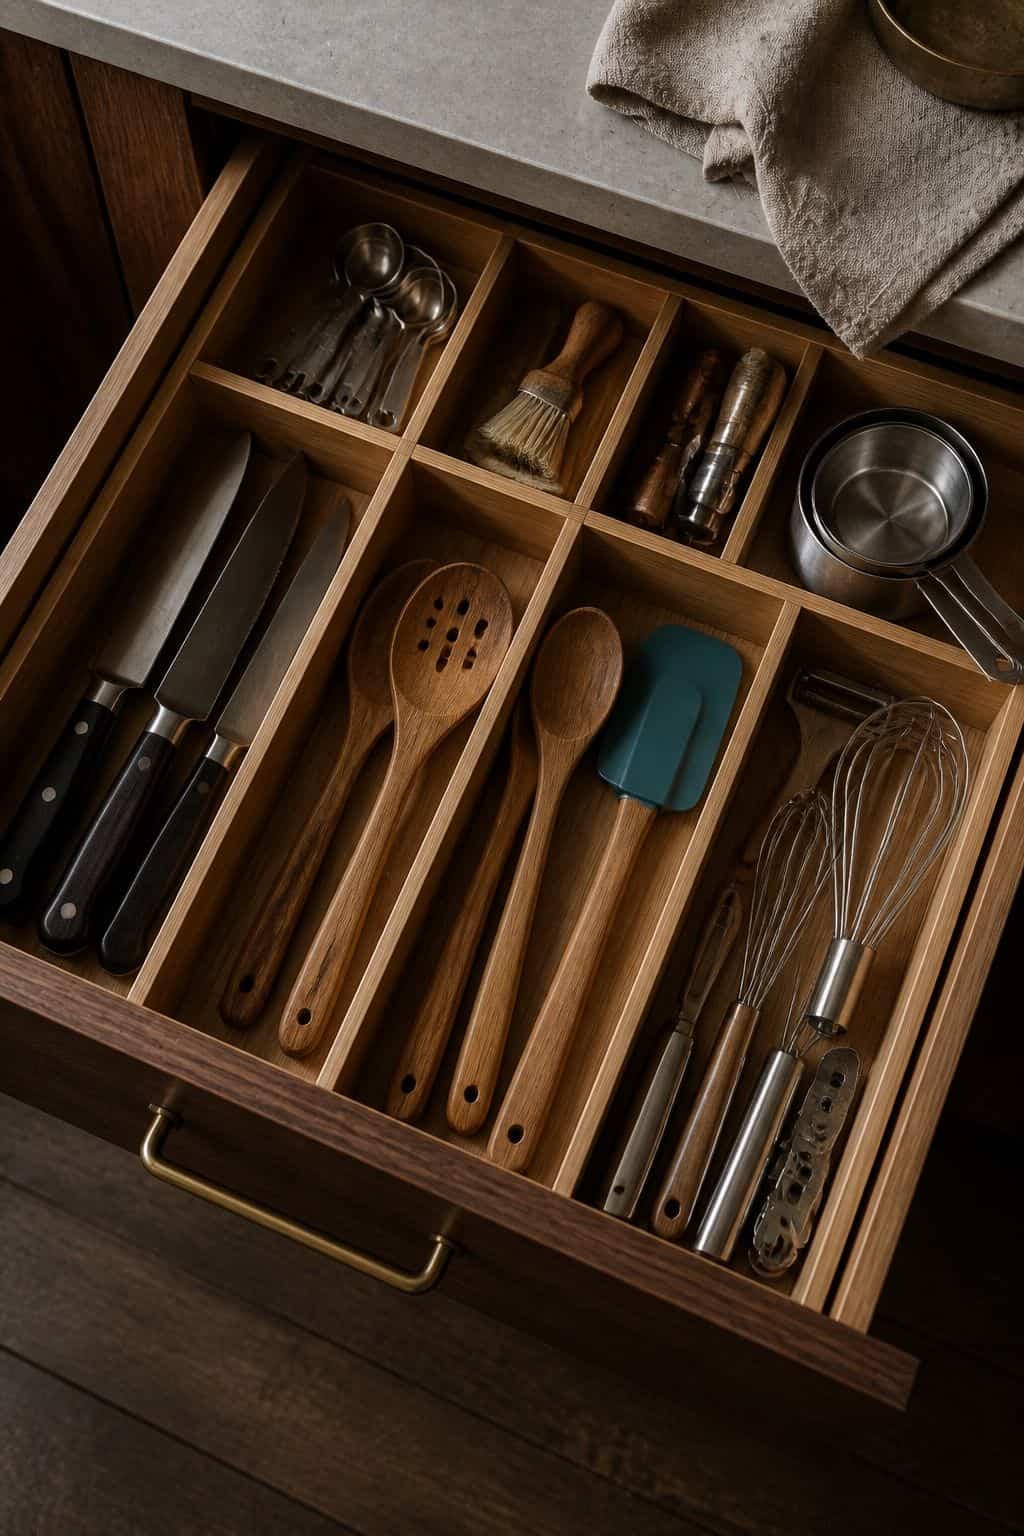


Drawer dividers separate utensils, knives, gadgets, and small tools into dedicated zones, eliminating the daily dig through a jumbled drawer. Expandable bamboo or plastic dividers fit any drawer size, with 3-7 compartments handling typical kitchen utensil sets.
Source from Container Store, IKEA Variera, or Amazon basics for $15-40 per drawer. Custom-cut wood dividers from Etsy run higher but deliver a custom-built look.
Empty the drawer first and sort the contents into piles before you buy, since that tells you how many compartments you actually need rather than guessing. Spring-loaded dividers stay put better than loose ones once the drawer slams shut a few hundred times. Give your most-used tools, the spatula, the tongs, the can opener, the front compartment, and the whole drawer becomes a glance instead of a dig.
Read more: Top 15 Outdoor Kitchen Patio Decor Ideas to Enhance Your Backyard
5. Use baskets or bins to group similar items
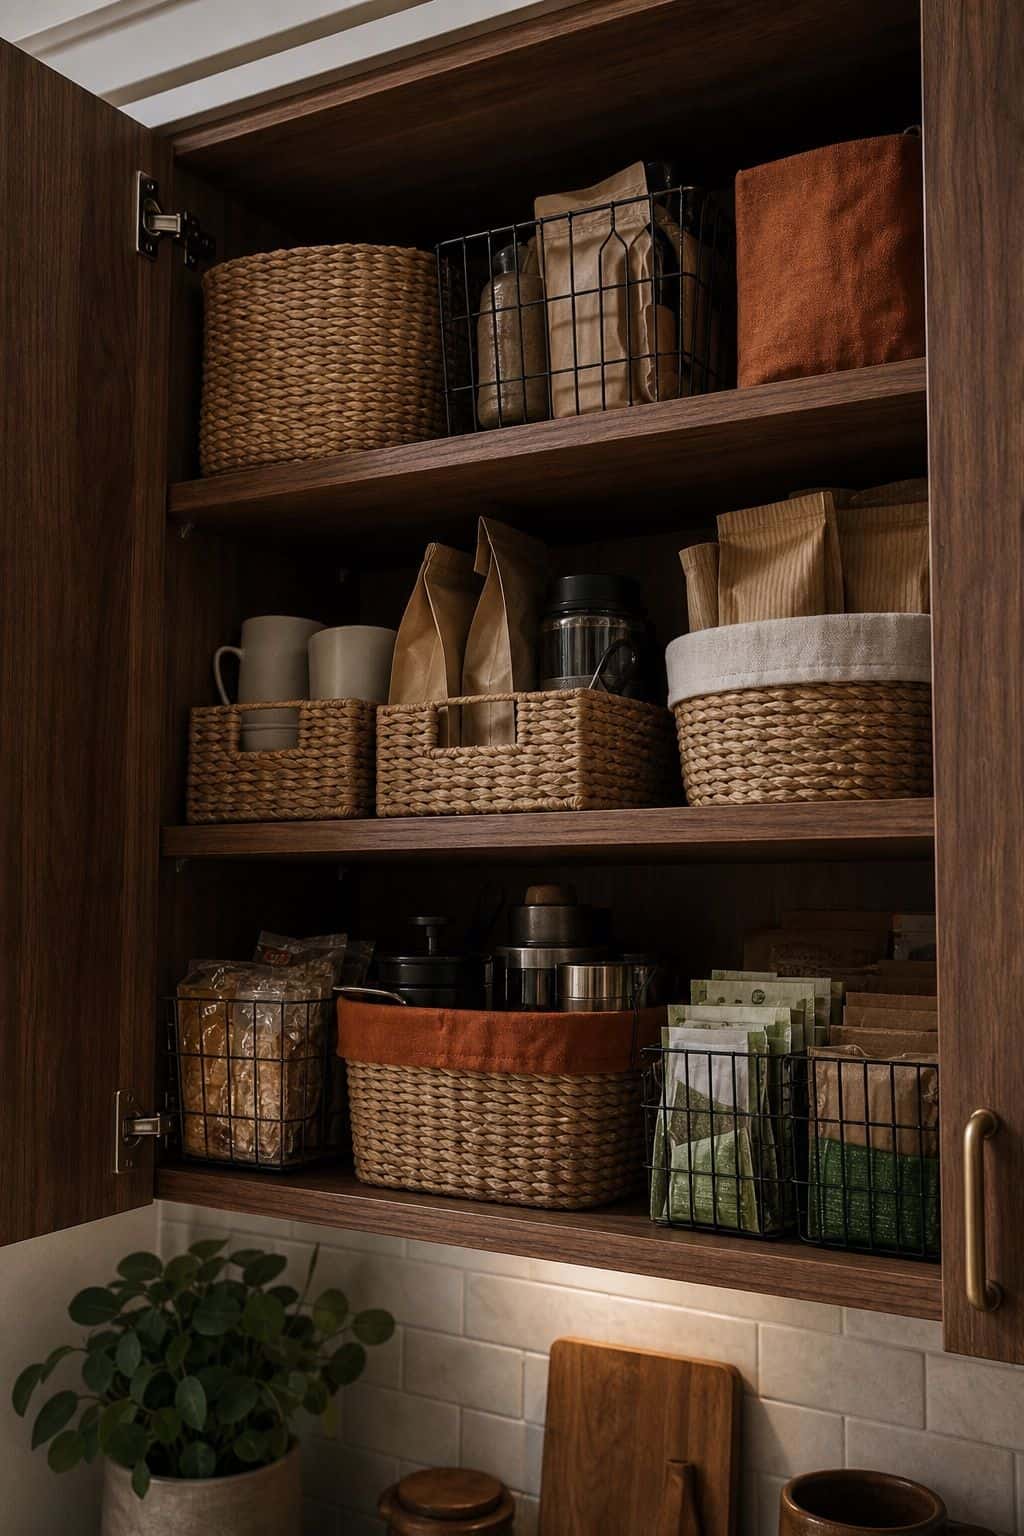


Small wire, fabric, or woven baskets inside cabinets corral similar items (snack packs, coffee supplies, hot chocolate mixes, tea bags) so they stay grouped rather than mingling.
The basket also doubles as a tray that lifts out for serving or for moving the whole group to a different location. Baskets in standard 10-12 inch widths fit most cabinets.
Baskets with a cutout handle on the front are easier to grab off a high shelf than ones with no grip at all. Think in terms of the way you actually use the kitchen, so a “lunchbox” basket of snacks and a “drinks” basket of tea and cocoa pull out as whole stations rather than scattered items. Sticking to one basket material across a cabinet, all woven or all wire, keeps the inside looking calm even when nobody can see it but you.
Read more: Top 15 Kitchen Lamps on Counter Ideas for a Warm and Lit Workspace
6. Keep frequently used items at eye level
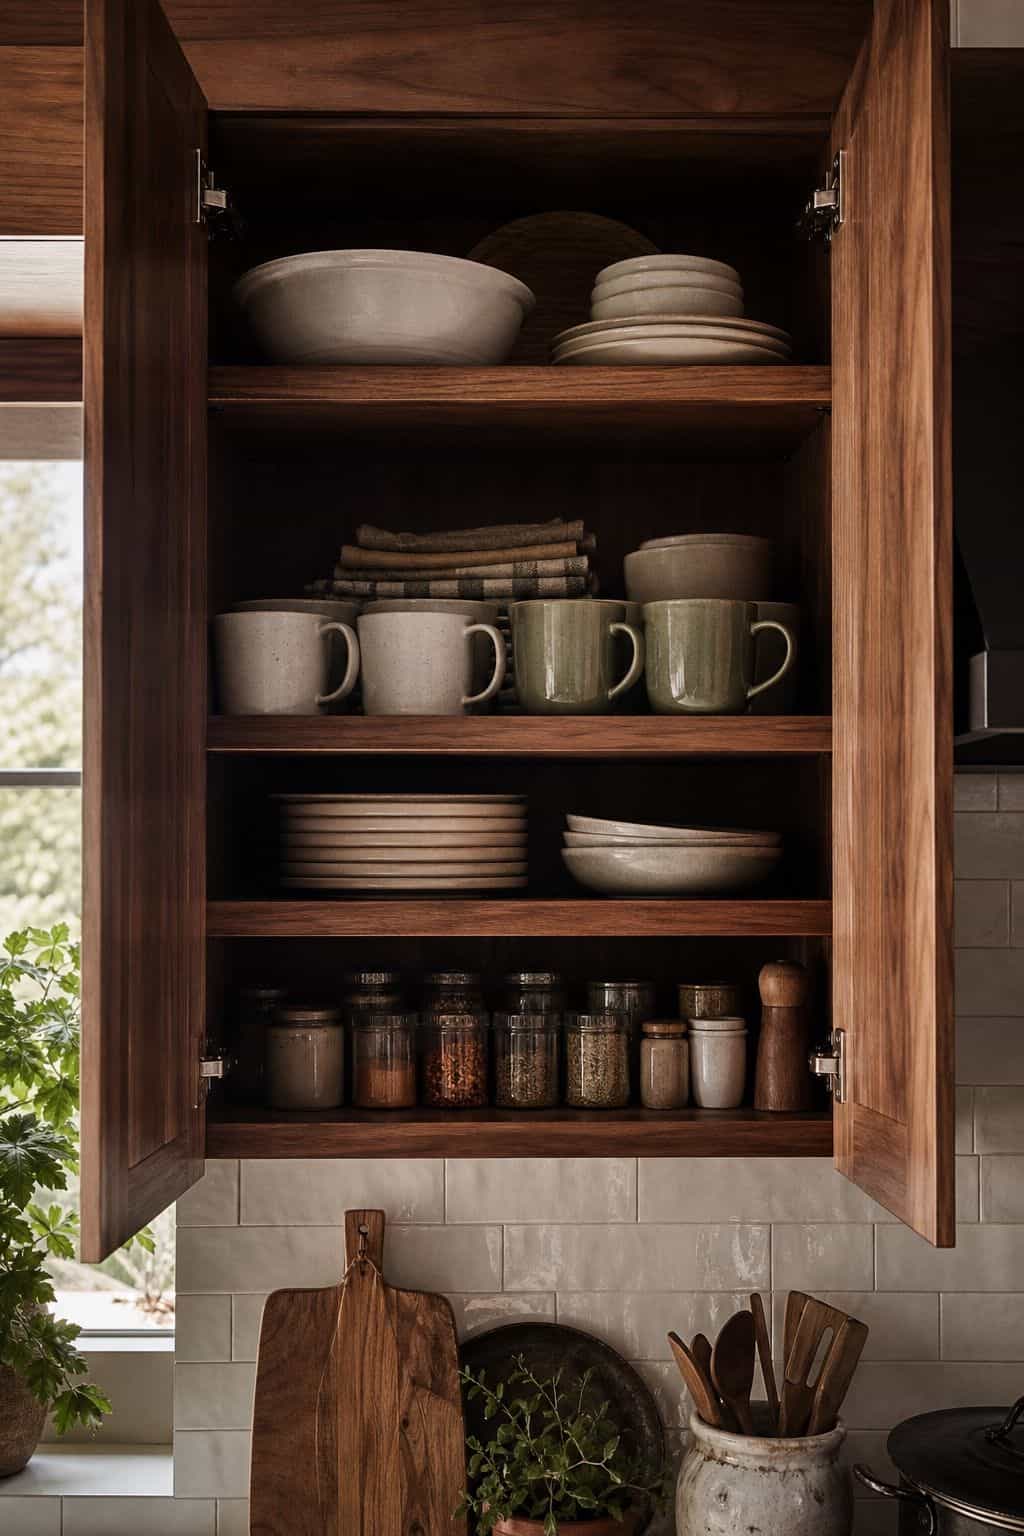


Items used daily (coffee mugs, daily-use plates, common spices) belong at eye level (the second or third shelf in a standard upper cabinet). Items used weekly (extra dishes, baking pans) go above or below.
Items used monthly or seasonally (specialty appliances, holiday dishware) go on the top or bottom shelves where reaching them takes a step or a crouch. The arrangement makes the most-used items easiest to access.
The honest test is to watch yourself cook for a week and notice what you reach for without thinking, then put those things in the easy zone whatever the old layout said. Heavy items belong low so you are never lifting a cast-iron pan over your head, and rarely-used pieces can go up high without complaint. When the layout finally matches your habits, the kitchen stops fighting you and the system holds because it took zero willpower to keep.
Read more: Top 17 Breakfast Counter in Kitchen Ideas for a Welcoming Eat-In Space
Vertical Storage and Risers
7. Incorporate vertical racks for baking sheets and cutting boards
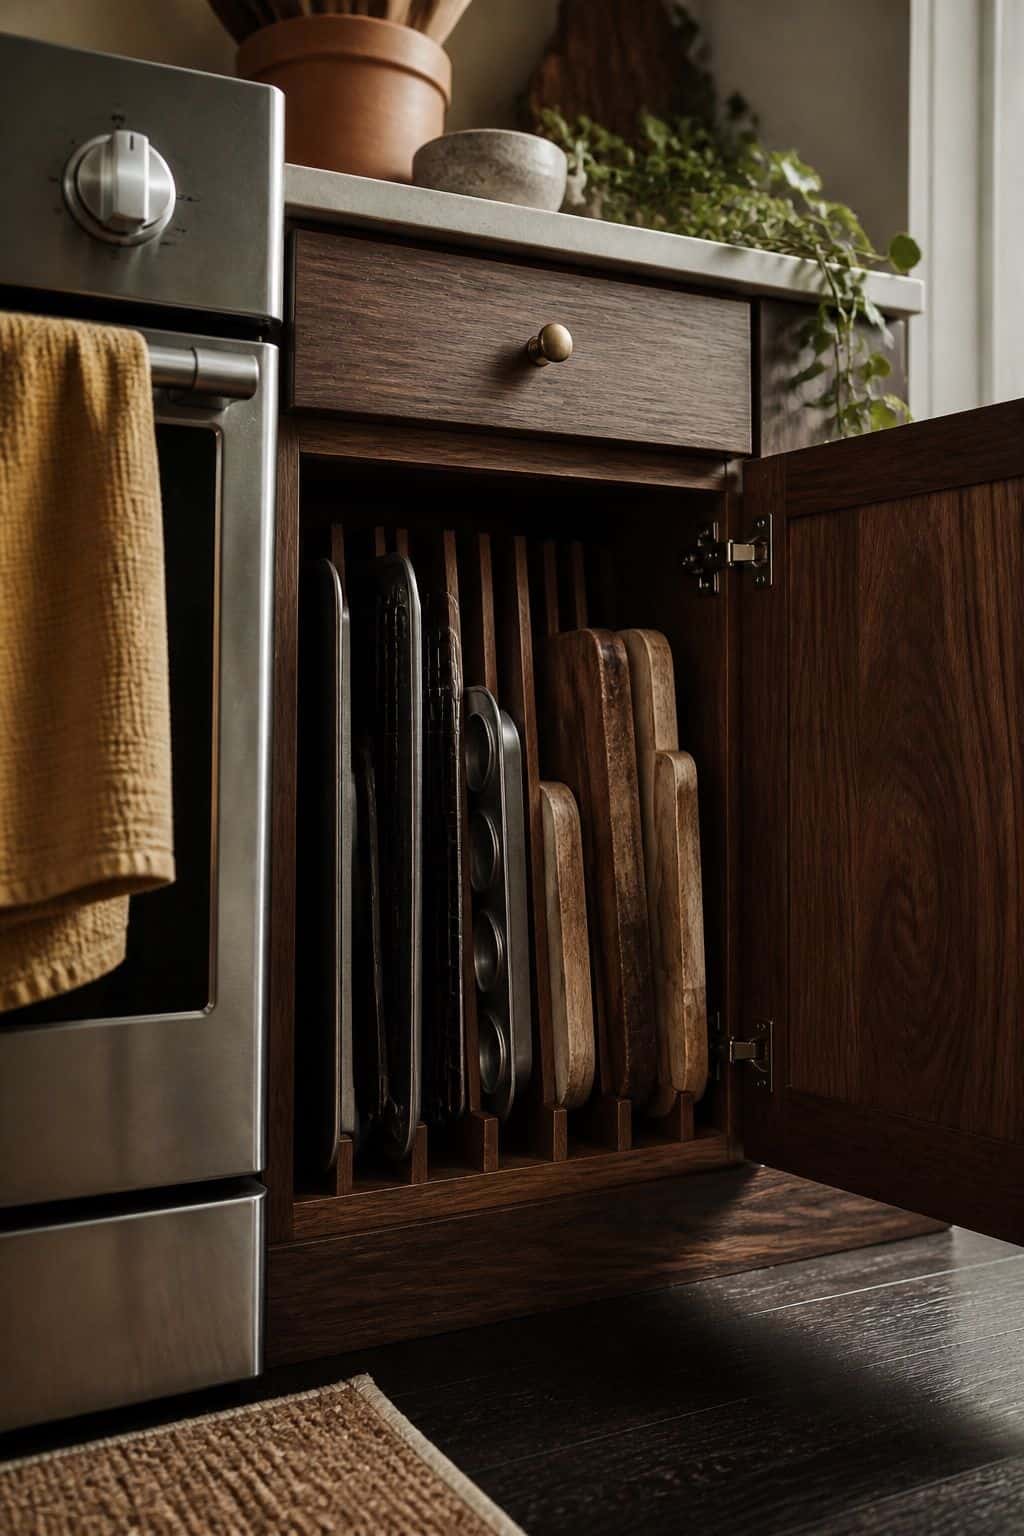


Stacking baking sheets and cutting boards flat means digging through the whole pile to reach the bottom one. A vertical wire or wood rack stands them upright like books, with each piece pulling out individually.
Rev-A-Shelf, Lipper, and YouCopia all make vertical racks at $15-50. Install in the cabinet beside the oven for grab-and-bake access, or in a tall pantry cabinet for general storage.
Adjustable racks with movable dividers earn their spot, since a thin cooling rack and a chunky cast-iron griddle need very different slot widths. Sort the rack tallest at the back to shortest at the front so you can read the whole lineup at a glance. The same rack handles cookie sheets, muffin tins, pizza pans, and serving platters, which clears out the single most chaotic stack in most kitchens.
Read more: Top 16 Corner Sink Kitchen Decor Ideas for the Best Seat in the
8. Use stackable shelf organizers to maximize space
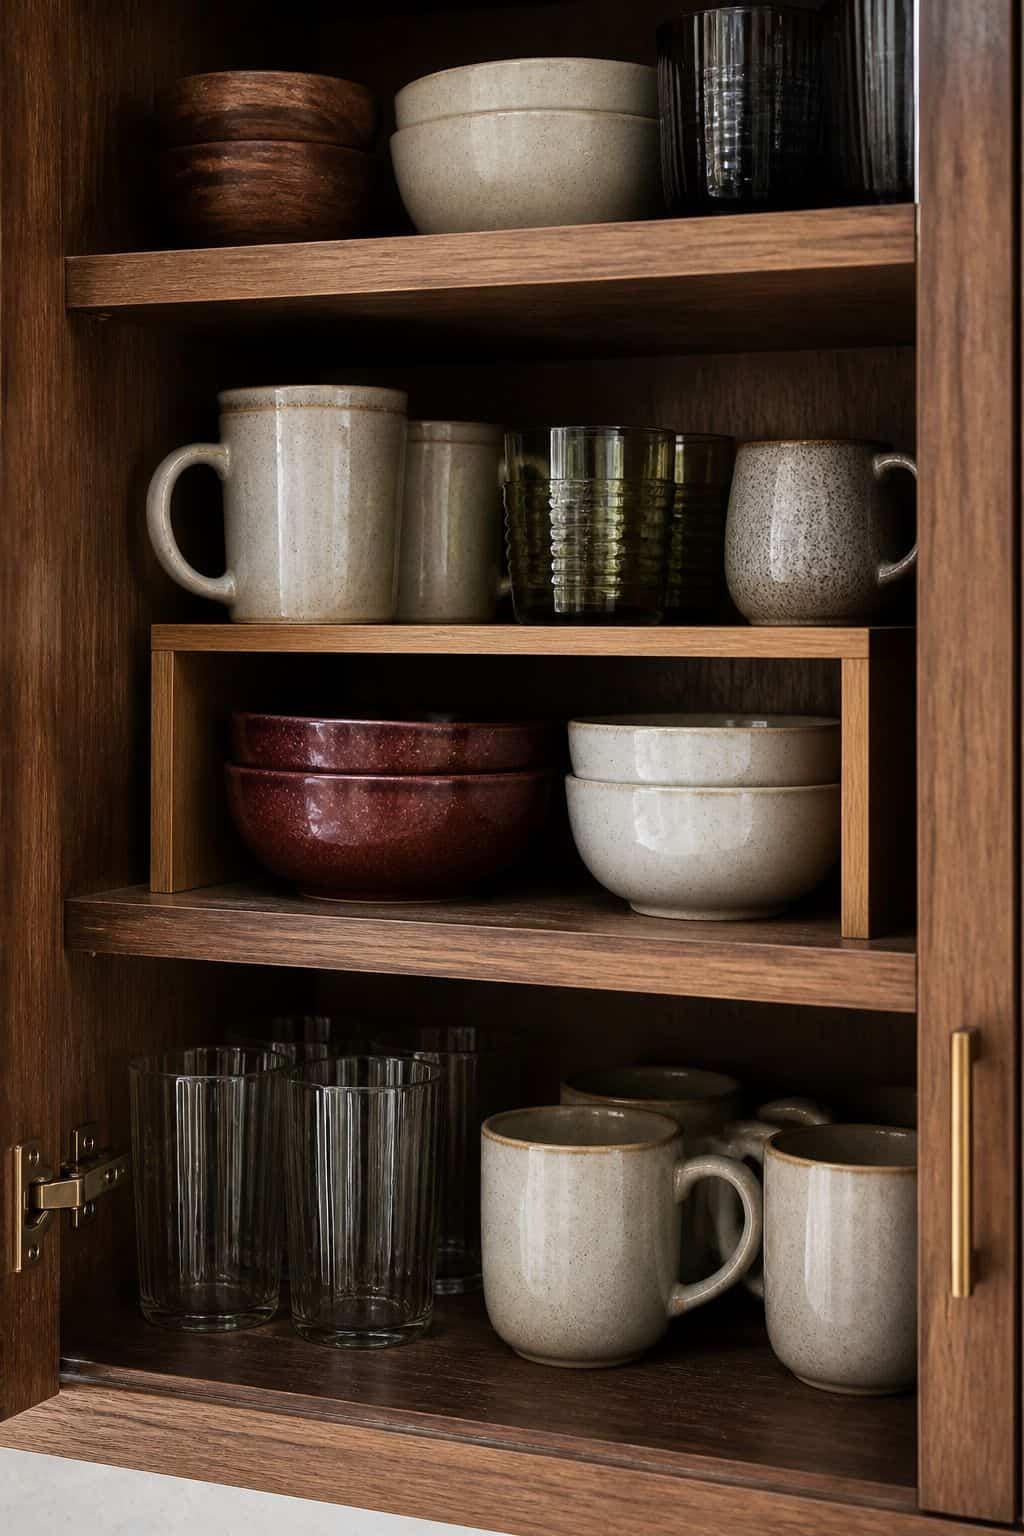


A single cabinet shelf often has 6+ inches of unused vertical space between items and the shelf above. A stackable wire or wood shelf riser adds a second tier within that space, effectively doubling storage capacity.
Use risers for plates, glasses, mugs, or canned goods. Brands like YouCopia, Joseph Joseph, and Amazon basics all make adjustable risers at $15-40 each.
Before buying, measure the gap from the shelf to the items above so the riser actually fits in the leftover air. A riser is at its best over short items, mugs, small bowls, spice jars, where the wasted headroom is biggest. Picking one with a non-slip coated finish keeps glassware from skating off the edge when the cabinet door bumps shut.
9. Add shelf risers to create extra storage layers
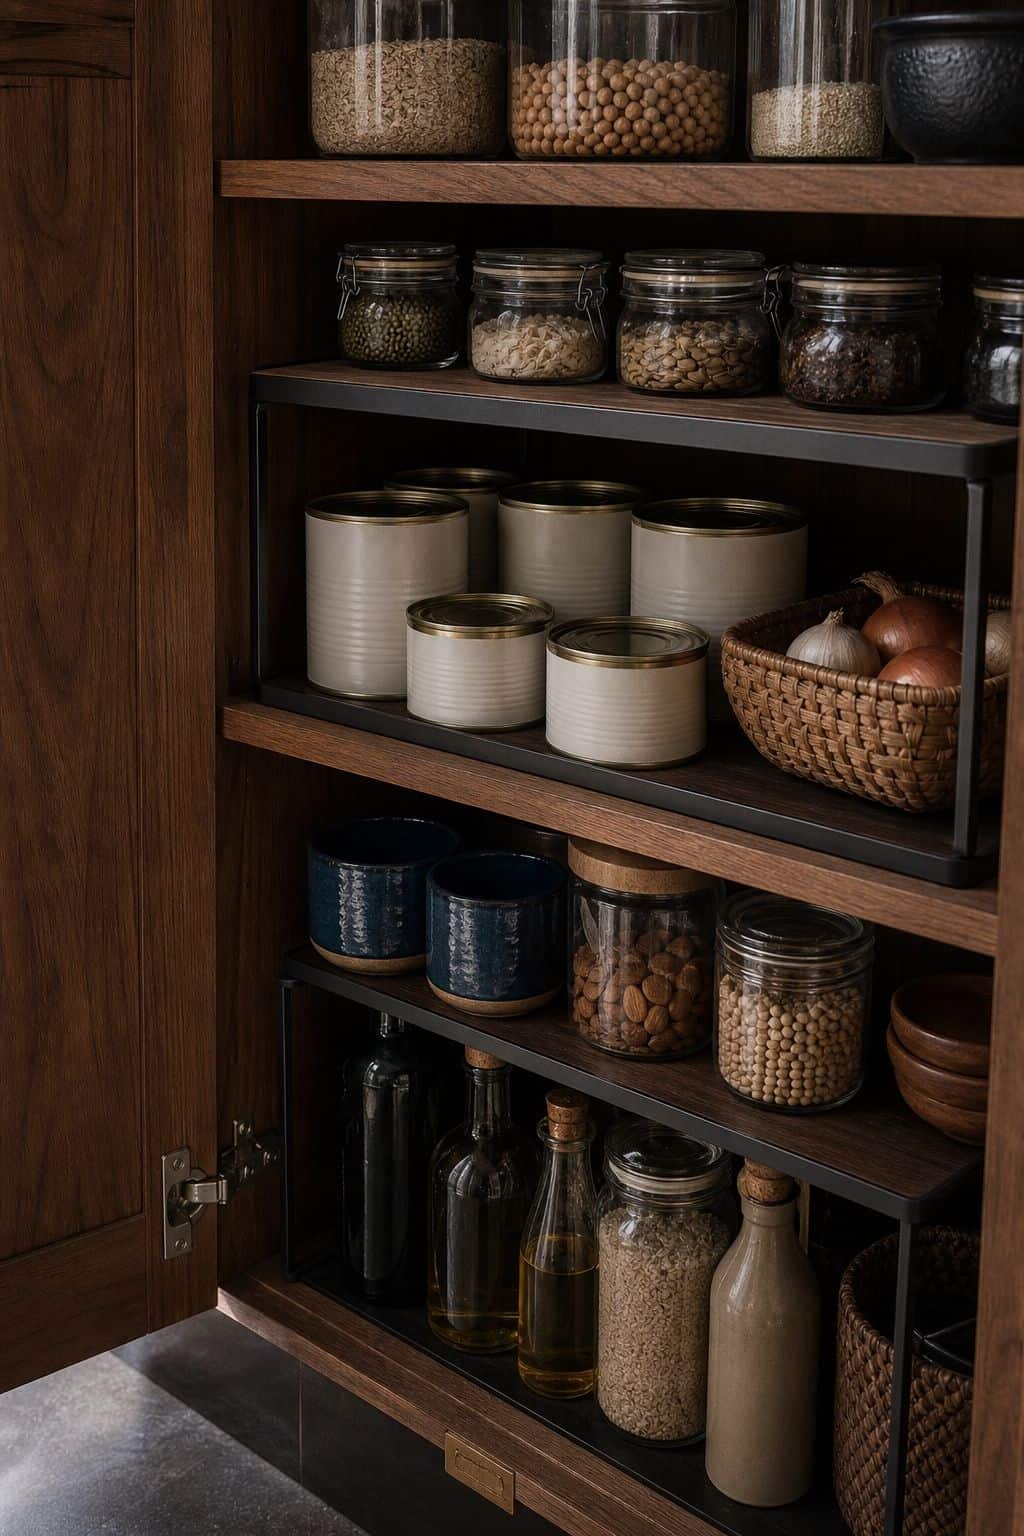

Beyond stackable risers, taller shelf risers (8-12 inches tall) can create a complete two-tier layout within a single cabinet shelf. Place taller items underneath the riser and shorter ones on top.
Especially useful in deep cabinets where short items in front and tall items in back become hard to see otherwise. The two-tier approach turns one shelf into two functional zones.
Canned goods are the classic case here, since a riser steps the back row up so you can read every label without shuffling the front cans aside. Treat the under-riser zone as a tidy parking spot for tall bottles and the top zone for the small stuff you grab daily. A stepped riser also makes a quick inventory check possible, which is what stops you from buying a third jar of the same thing.
Read more: Top 17 Kitchen Counter Corner Decor Ideas for Functional Beauty
10. Use tension rods to create dividers for pot lids
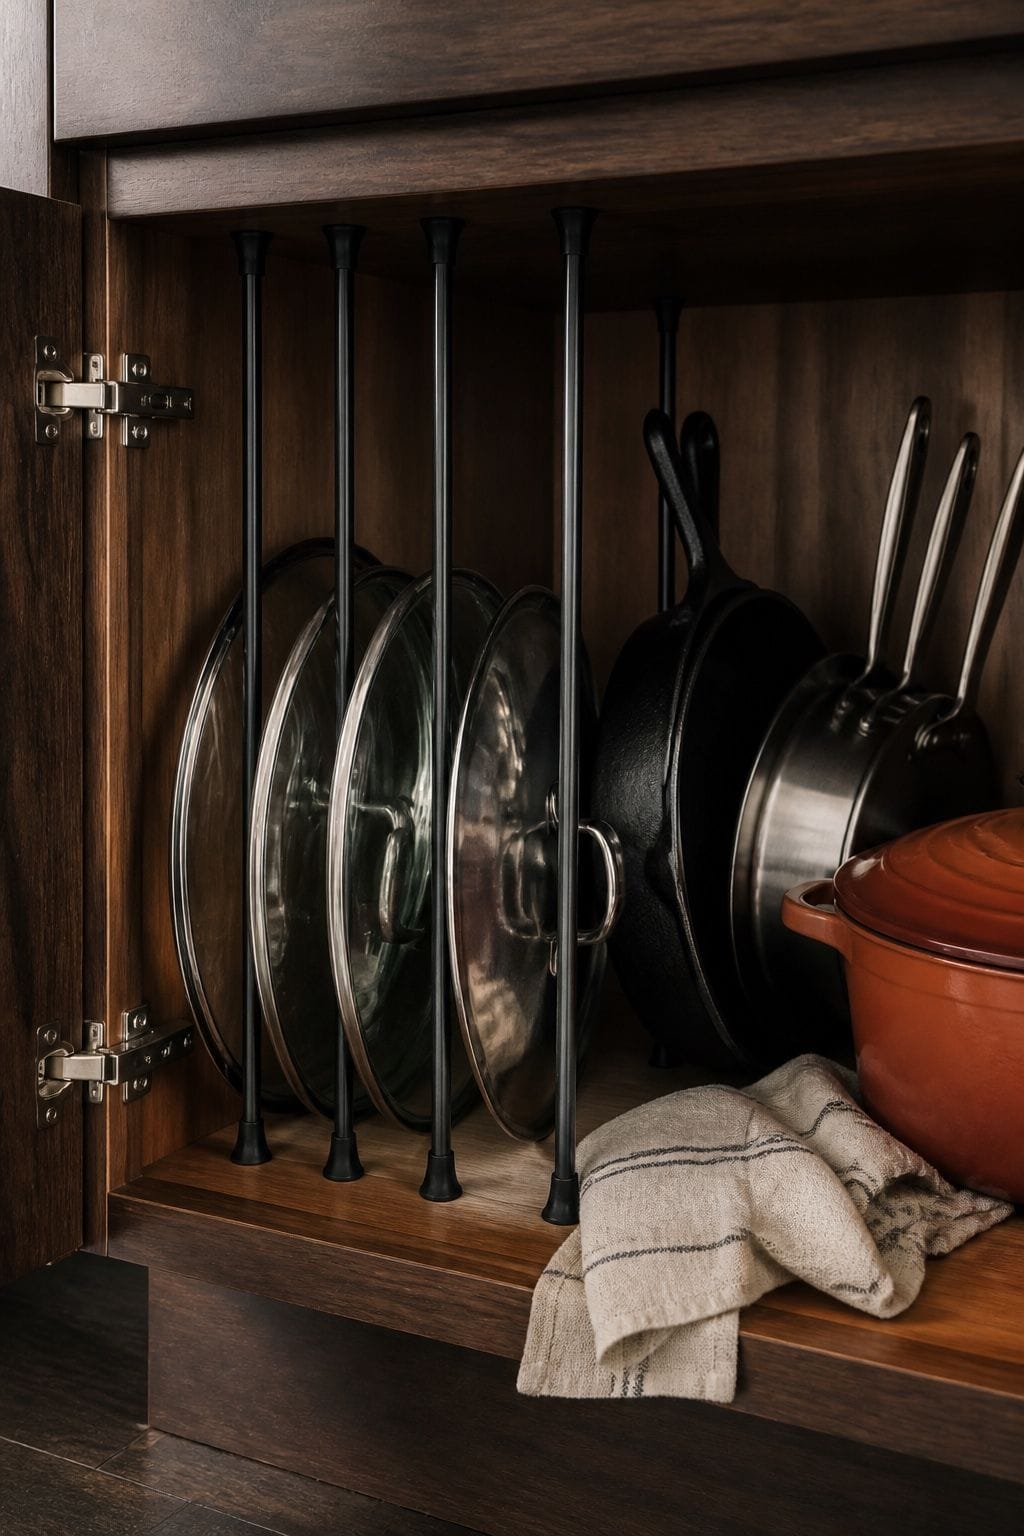


Pot lids stored loose in a cabinet end up in a precarious pile that collapses every time something is removed. Tension rods (the kind used for shower curtains) installed vertically inside a cabinet create individual slots for each lid.
Two tension rods spaced 1-2 inches apart, perpendicular to the cabinet floor, hold lids upright by their handles. A budget-friendly $10 solution that handles even oversized lids.
Set the slots wide enough to handle your bulkiest lid and the slimmer ones simply lean in with room to spare. Store the lids in the same cabinet as the pots they belong to, so grabbing a pan and its lid is one motion instead of two cabinets. The same trick works for plastic-container lids, which are otherwise the single most maddening thing to keep tidy in any kitchen.
Read more: Top 16 Christmas Kitchen Decor Ideas for a Warm Holiday Heart of the
Storage Layers and Containers
11. Use clear, labeled containers for dry goods
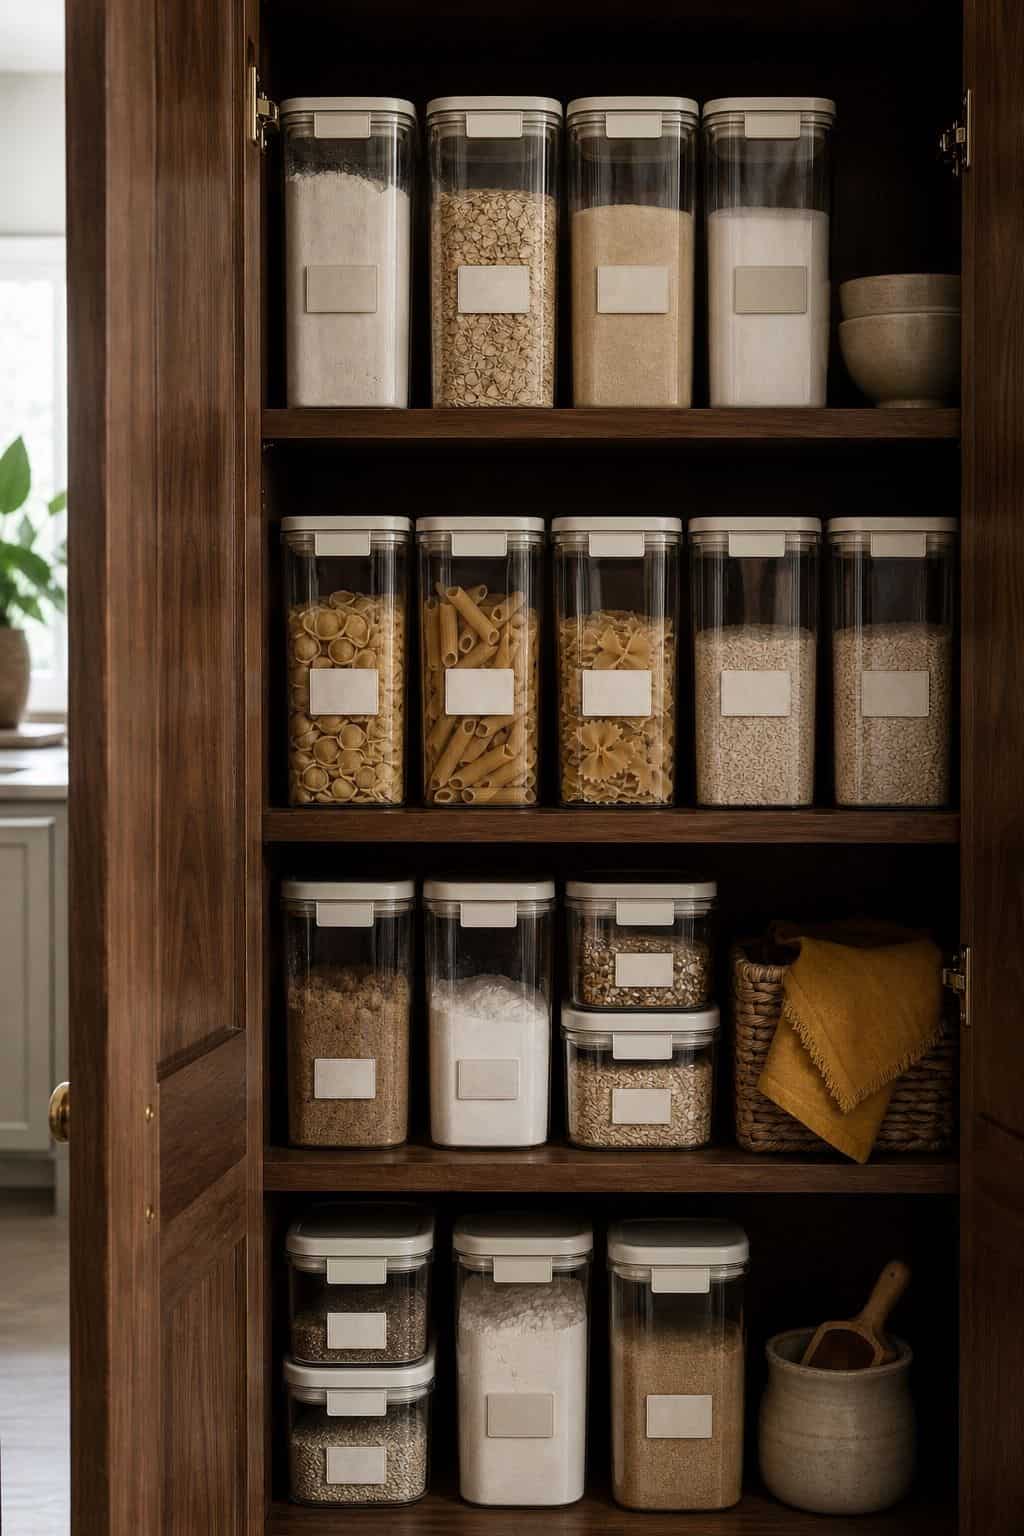


Original food packaging is the enemy of organized pantry cabinets, because bag heights vary, contents are hidden, and labels face every direction. A matching set of clear airtight containers (OXO Pop, Rubbermaid Brilliance, or generic glass jars) standardizes everything.
Label each container with the contents and (optionally) the expiration date. The visible inventory reduces the duplicate-buying problem and the airtight seal keeps dry goods fresh 2-3 times longer than original bags.
Square and rectangular containers use shelf space far better than round ones, which leave triangle gaps at every corner. You do not have to decant the whole pantry at once, so start with the staples you reach for daily, flour, sugar, coffee, pasta, and let the rest follow over a few grocery trips. Snipping the cooking instructions off the original bag and tucking them under the lid means you never lose the directions when the box goes in the recycling.
Read more: Top 16 Spring Decor Ideas for the Kitchen That Feel Bright and Clean
12. Hang hooks inside cabinet doors for measuring spoons or cups
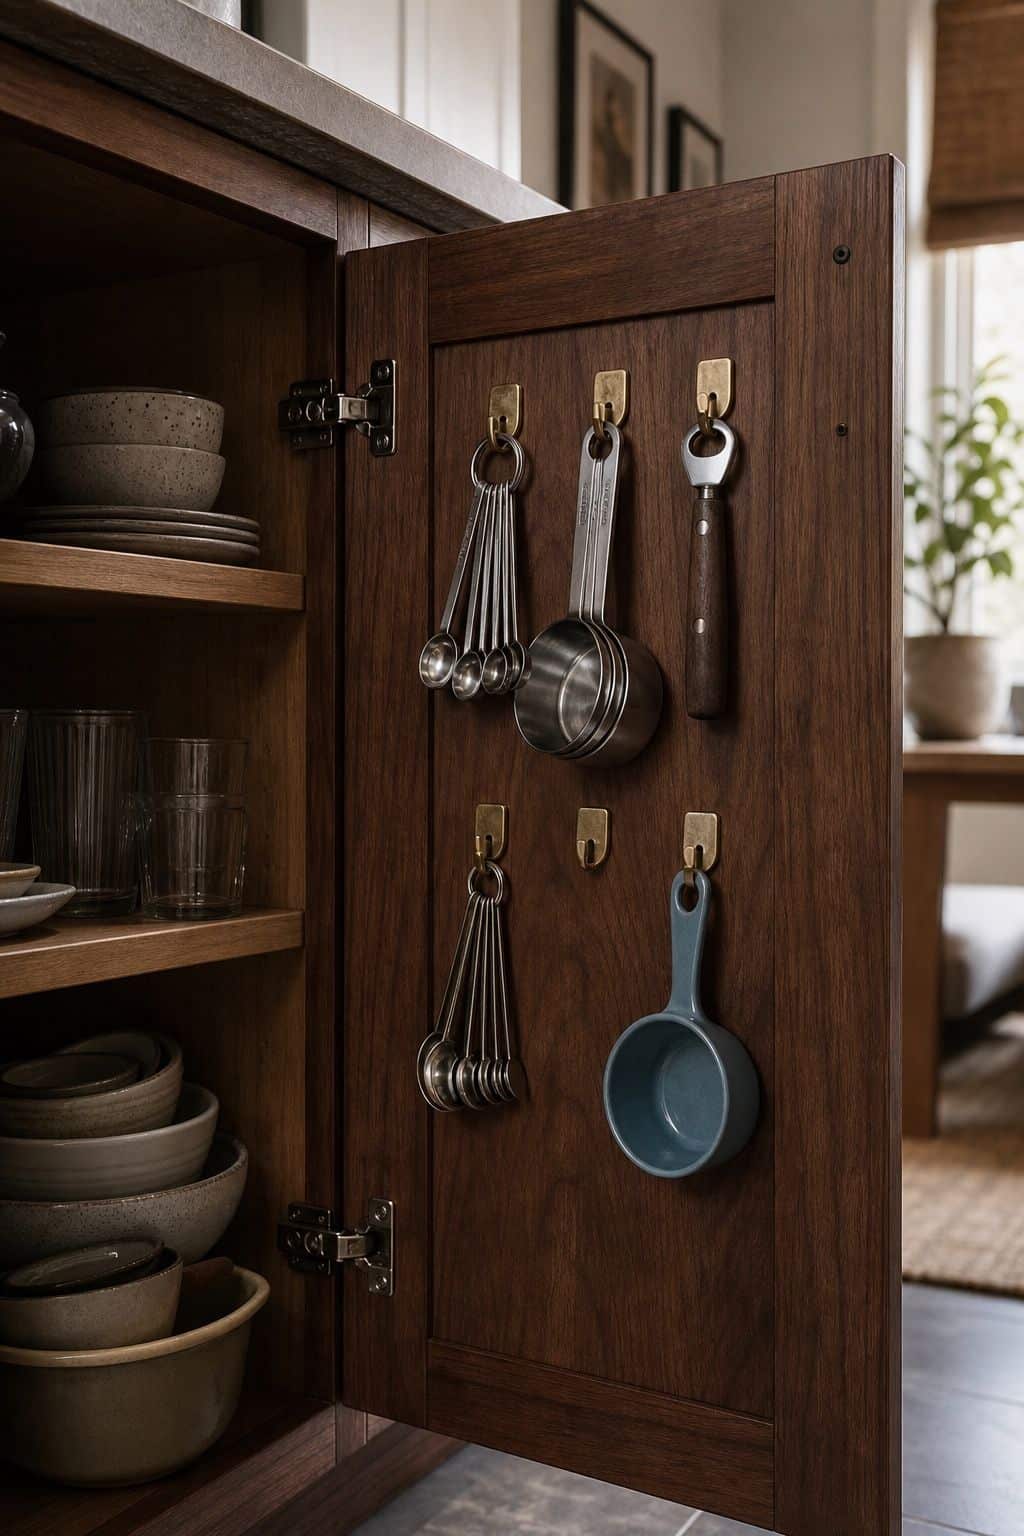


The inside of cabinet doors is wasted real estate in most kitchens. Adhesive hooks or small mounted racks on the inside of doors hold measuring spoons, cups, pot lids, or small utensils.
Pre-drilled cabinet-door organizers from Rev-A-Shelf or Hafele install in 10 minutes; adhesive hooks from Command or 3M offer a no-drill alternative.
Before mounting anything, swing the door shut to check the hooks clear the shelf edges, since a measuring cup that catches on a shelf stops the door from closing. Hang the items you reach for mid-recipe here, measuring spoons, the garlic press, the bottle opener, so they are right at hand without taking up drawer space. Adhesive hooks hold best when you wipe the door clean first and let them cure overnight before loading any weight.
Read more: Top 18 Halloween Kitchen Decor Ideas for a Spooky, Stylish Space
13. Store spices in a tiered rack or magnetic strip
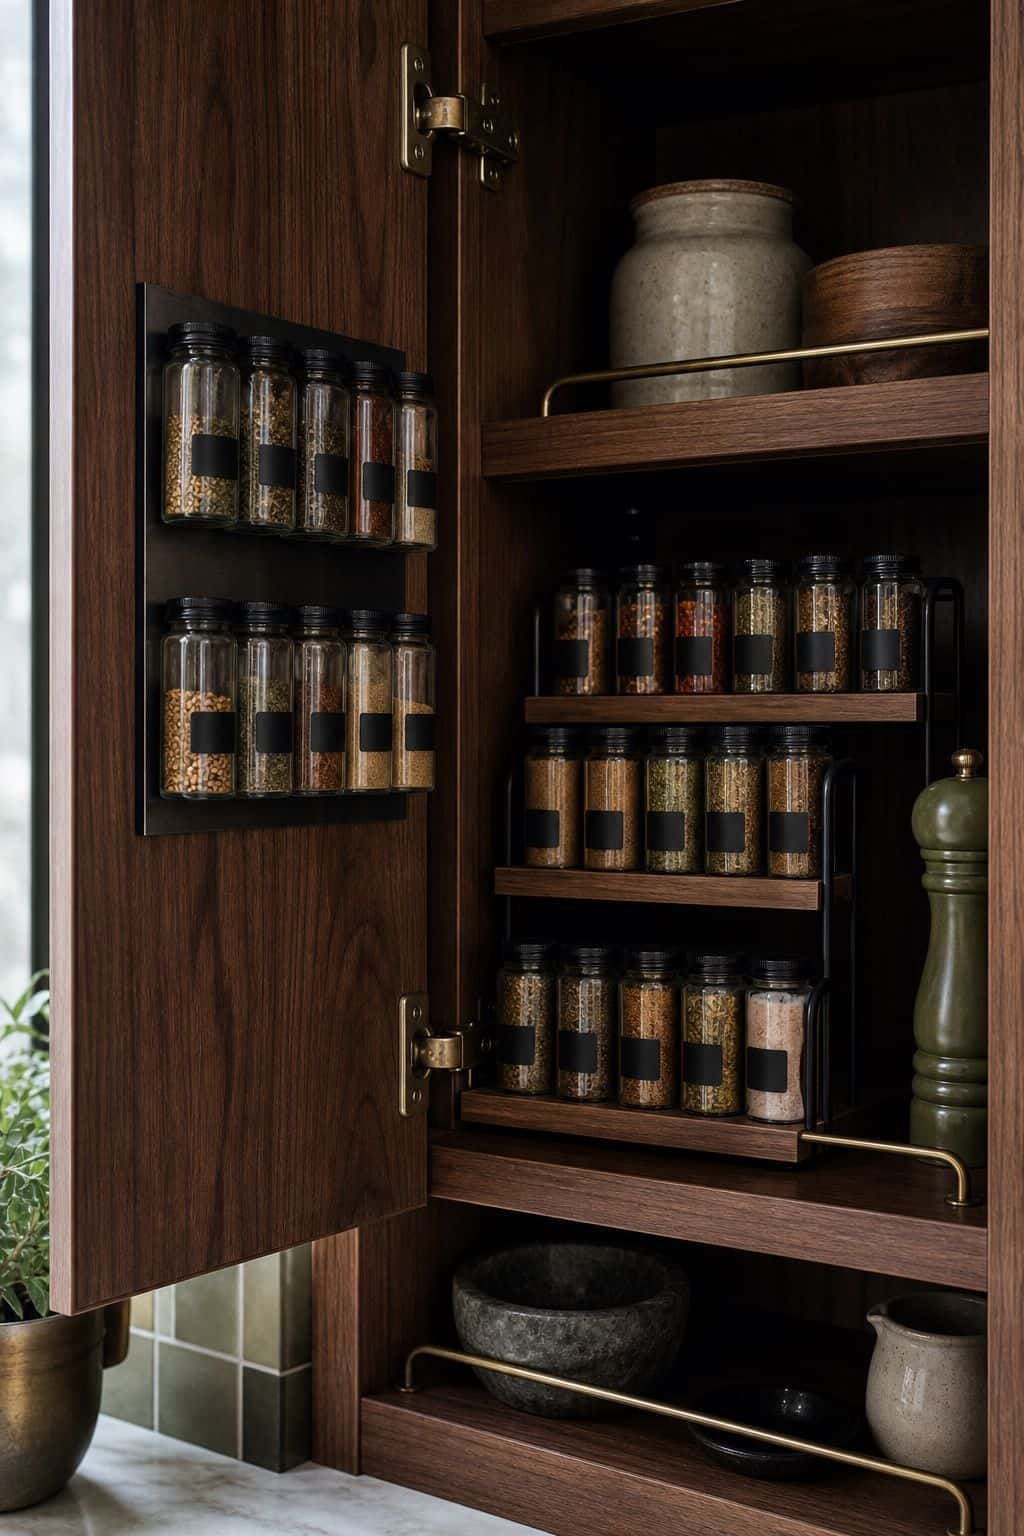


Spice jars stored flat on a cabinet shelf hide their labels and require lifting each jar to read it. A tiered spice rack (3 step levels) angles each row so all the labels are visible at once.
Alternative: magnetic spice tins mounted to a magnetic strip inside a cabinet door display every spice at eye level. Brands like Gneiss Spice and YouCopia make magnetic spice systems.
Whatever rack you choose, arrange the jars alphabetically and a mid-recipe hunt turns into a glance. Heat and light fade spice fast, so a cabinet near a window or right beside the stove is the worst home for them, and an interior cabinet keeps them potent longer. Refilling one set of matching jars from bulk bins also keeps the rack looking uniform and cuts the cost every time you restock.
14. Label shelves and containers for easy identification
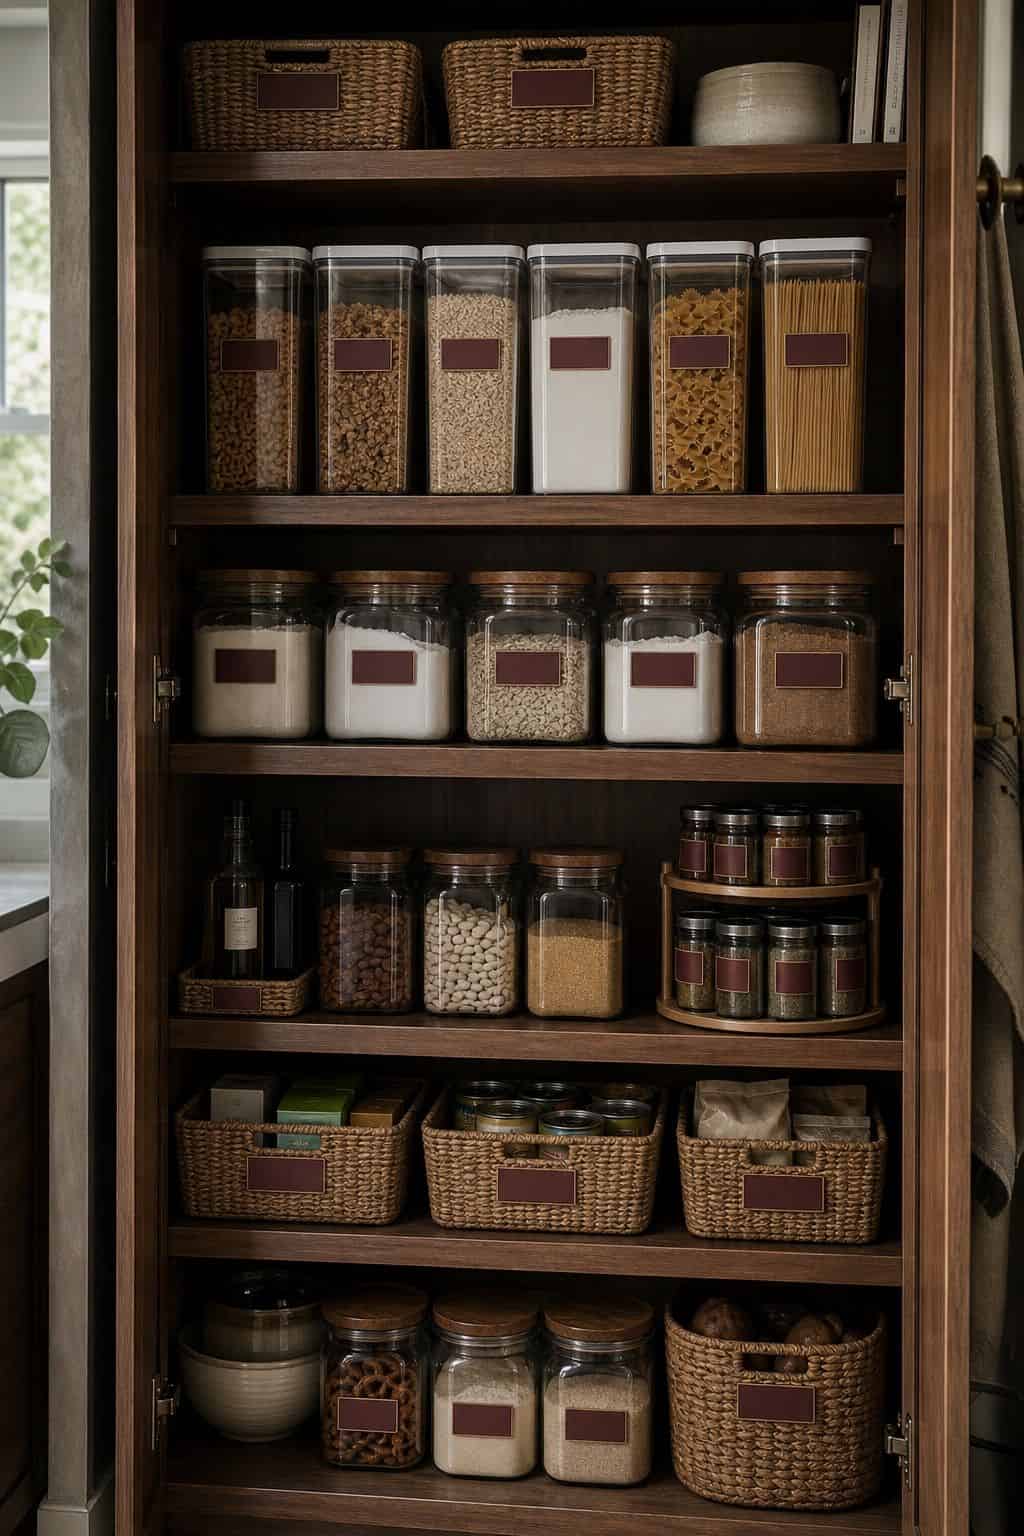


Once containers and zones are set up, labeling them prevents the system from breaking down over time. Chalkboard labels, vinyl printed labels, or a label maker tape make zones visible at a glance.
Label each cabinet shelf and container, especially in shared kitchens where multiple cooks use the same space. The label system becomes the contract everyone follows.
Print labels rather than handwriting them and the cabinet instantly looks more put-together, with a consistent font doing quiet styling work. Place each label on the front face at eye level so it reads without bending or lifting the container. In a shared kitchen the label is also a gentle nudge that keeps a roommate from inventing their own filing system every other week.
Read more: Spanish Mediterranean Kitchen Ideas That Make Every Meal Feel Like a
15. Install under-cabinet lighting for better visibility
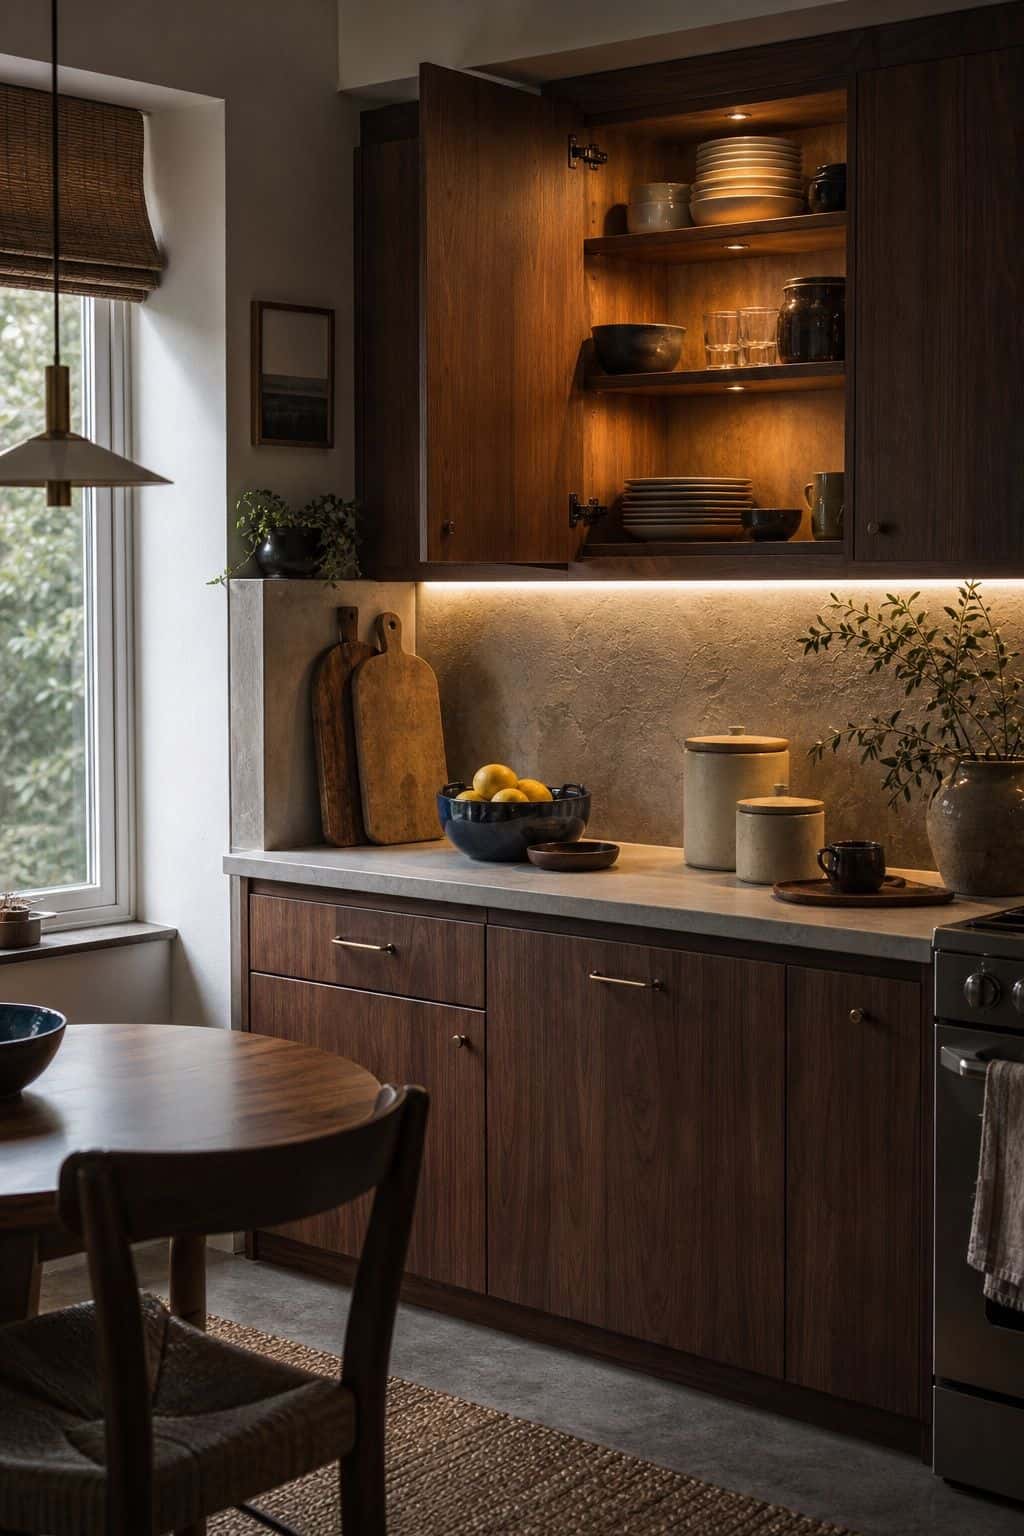


Dim cabinets make organization harder because contents disappear in shadows. Under-cabinet LED strip lights or puck lights illuminate countertops and the underside of cabinets, making everything visible without opening the cabinet.
Brands like Philips Hue, Lutron, or generic Amazon LED strips install with adhesive backing and plug into a nearby outlet. Battery-operated motion-sensor versions for inside the cabinet itself add visibility when doors open.
Choose a warm-white strip around 2700K to 3000K, since cooler light makes the kitchen feel like an office and washes the warmth out of wood. Mount the strip toward the front underside of the cabinet so the light falls onto the counter and into the cabinet mouth, not just the backsplash. Tucking the cord along the cabinet seam keeps the wiring out of sight and the upgrade looking built-in.
Read more: Top 18 Kitchen Counter Coffee Bar Ideas That Actually Work
Want every kitchen cabinet to read as calm and organized rather than chaotic?
The Aesthetic Apartment Makeover Guide walks through every room with budget-friendly ideas. $17 now, soon $27.
Frequently Asked Questions
What is the best way to organize kitchen cabinets?
Group by category (baking supplies together, breakfast items together, dinnerware together), store frequently-used items at eye level, use pull-out shelves for deep cabinets, install lazy Susans in corners, add vertical racks for baking sheets, and label everything.
How do I organize a small kitchen with limited cabinets?
Maximize vertical space with shelf risers and stackable organizers. Use door-mounted racks for utensils and lids. Group like items in baskets. Decant pantry items into matching clear containers to save space and avoid duplicates.
What containers should I use for pantry items?
Matching clear airtight containers in standardized shapes (square or rectangular stacks more efficiently than round). OXO Pop, Rubbermaid Brilliance, and Lock and Lock all make reliable sets. Glass jars work well for visible dry goods.
How often should I reorganize kitchen cabinets?
Major reorganization once a year (typically January or after a deep clean). Minor adjustments monthly as habits change. The system should hold steady for 8-12 months with the right initial setup.
Are pull-out shelves worth the cost?
Yes for deep base cabinets where back items are otherwise hard to reach. The 30-50 percent gain in usable space and the daily time savings justify the $50-150 per shelf cost. Budget DIY pull-outs from IKEA or Amazon work for standard cabinet sizes.
Key Takeaways
- Pull-out shelves in deep cabinets and lazy susans in corners double effective storage.
- Drawer dividers turn one chaotic drawer into 6-8 organized zones.
- Vertical racks for baking sheets and pot lids beat horizontal stacking every time.
- Clear airtight containers with labels replace food packaging chaos.
- Tiered shelf risers turn 6 inches of dead air into a second usable tier.
- Door-mounted hooks and racks use the wasted inside-cabinet-door real estate.
Final Thoughts
Kitchen cabinet organization is the single most-impactful kitchen upgrade for daily cooking life. The right combination of pull-outs, lazy Susans, drawer dividers, vertical racks, and matching containers transforms cabinets from chaos to calm. Build the system once with the right products, label everything, and the kitchen earns back hours per week in faster cooking and fewer duplicate purchases.
Last update on 2026-08-21 / Affiliate links / Images from Amazon Product Advertising API
