
Quick Answer: Landscaping with large rocks looks natural when you place a few large anchor boulders first and build everything else around them, group stones in random clusters rather than neat rows, and pair the rock with plants so it never reads as a bare pile. Warm-toned stone, greige, sandy tan, terracotta-tinted river rock, looks more organic than classic blue-gray in 2026.
Almost all rock landscaping fails for the same reason, and it has nothing to do with skill. It is too tidy. Stones lined up like a border, every one the same size, spaced out like a parking lot. Nature has never once done that, and your eye clocks it the second you pull into the driveway.
The fix is mostly restraint. A few large anchor boulders go in first, smaller stones get grouped in loose random clusters around them, and plants fill the gaps. The stone itself has shifted lately too, warm neutrals like greige, sandy tan, and terracotta-tinted river rock are pushing out the old blue-gray, because they read as sun-drenched instead of industrial.
The 17 ideas here run in the order you would actually do the work: place the anchors, arrange, plant, then finish. Full front yard or a small patio corner, the natural-look rules do not change. And if your outdoor space is more balcony than yard, our small apartment patio ideas scale the same instinct down.
Want the inside of your home to feel as considered as the yard?
The Aesthetic Apartment Makeover Guide walks you through every space with real, budget-friendly ideas you can actually use. Grab it now for just $17, the price goes up to $27 soon.
Recommended Landscaping Rock Products


Recommended blogs to read:
- Zen garden home decor
- Sunroom garden ideas
- Outdoor patio roof ideas
- Fall porch decor ideas
- Garden summer decor ideas
Place the Anchor Boulders
1. Set the Largest Rocks First
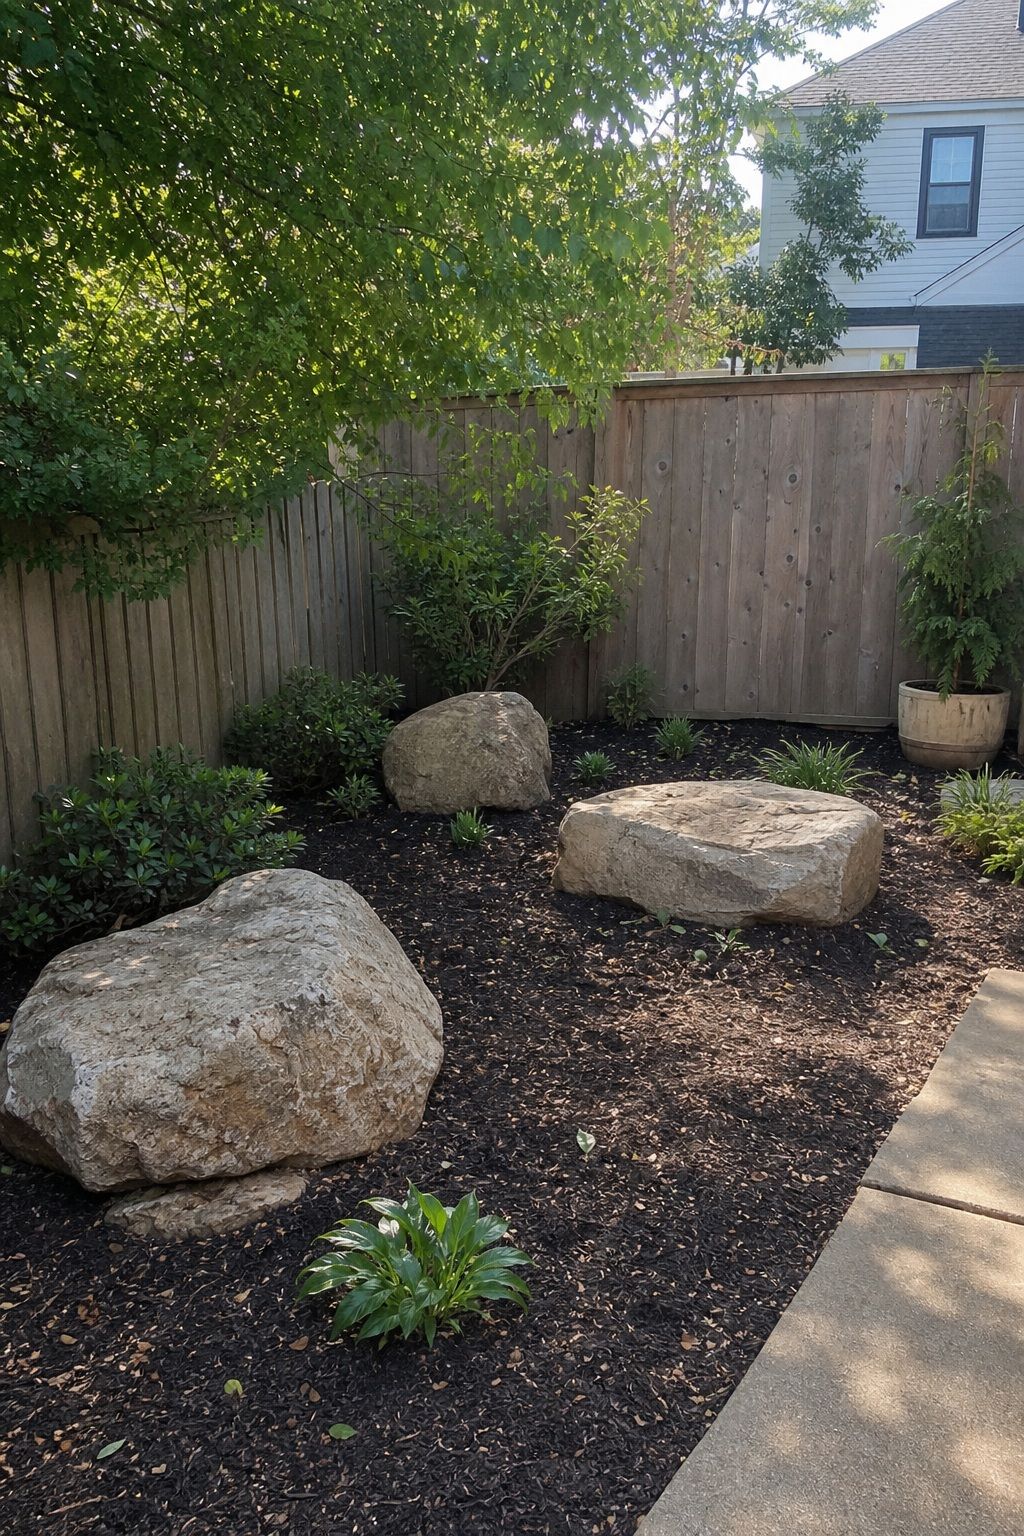


Start with the biggest rocks, not the small ones. Working up from the pebbles is the mistake almost everyone makes, and it leaves the composition with nothing holding it together. The largest boulders are the anchors, so they go in first, before a single pebble or plant, and everything else gets arranged around them.
Choose one or two genuinely large rocks as the primary focal points, the kind that take effort to move, and set them where the eye should land, near an entry, at a bend in a path, anchoring a bed corner. Bury each one a third of the way into the soil so it looks like it grew there rather than getting dropped on top. A boulder sitting fully on the surface always reads as placed.
Read more: Top 17 Bathroom Vanity with Makeup Counter Ideas for a Dream Setup
2. Bury Rocks Partway for a Settled Look
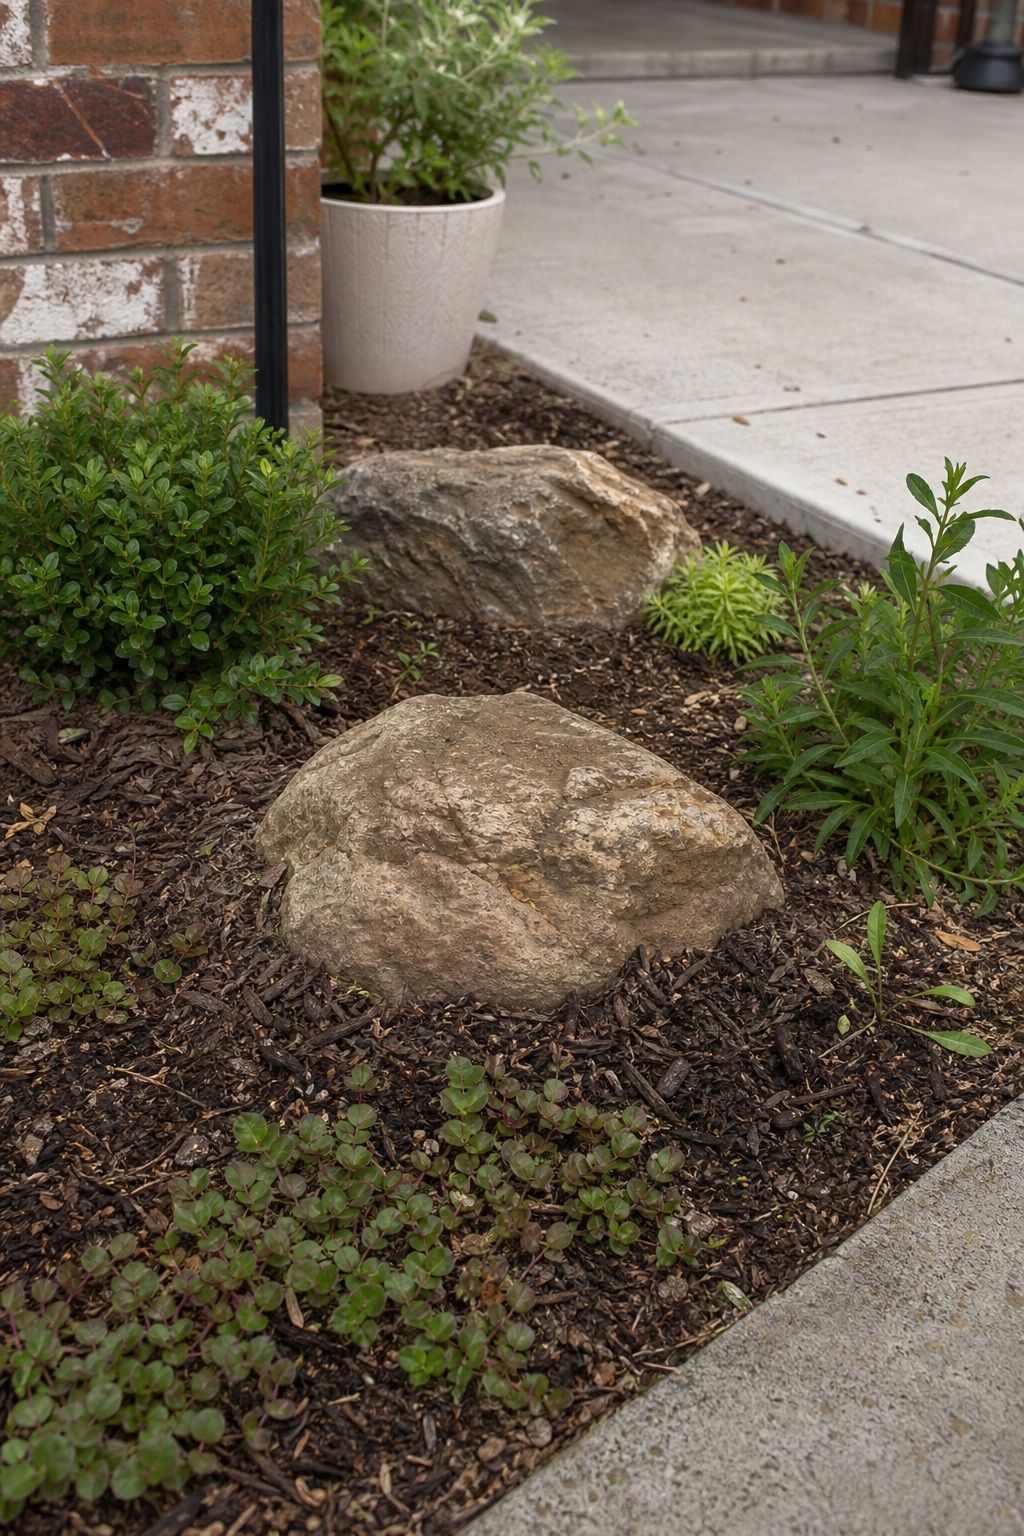


Depth is what makes a rock look like it belongs there. A stone sitting fully on the surface always reads as dropped and placed, while one that looks like it is emerging from the ground reads as part of the terrain. Burying every significant stone a quarter to a third of its height is the trick that sells it.
Angle them as you set them, too, the way exposed rock actually tilts in nature, rather than sitting them perfectly level like furniture. Pack soil firmly around the base so no gap shows. This one habit, partial burial at a natural angle, does more for realism than the shape or color of the rock ever will.
3. Scale the Rocks to the Space
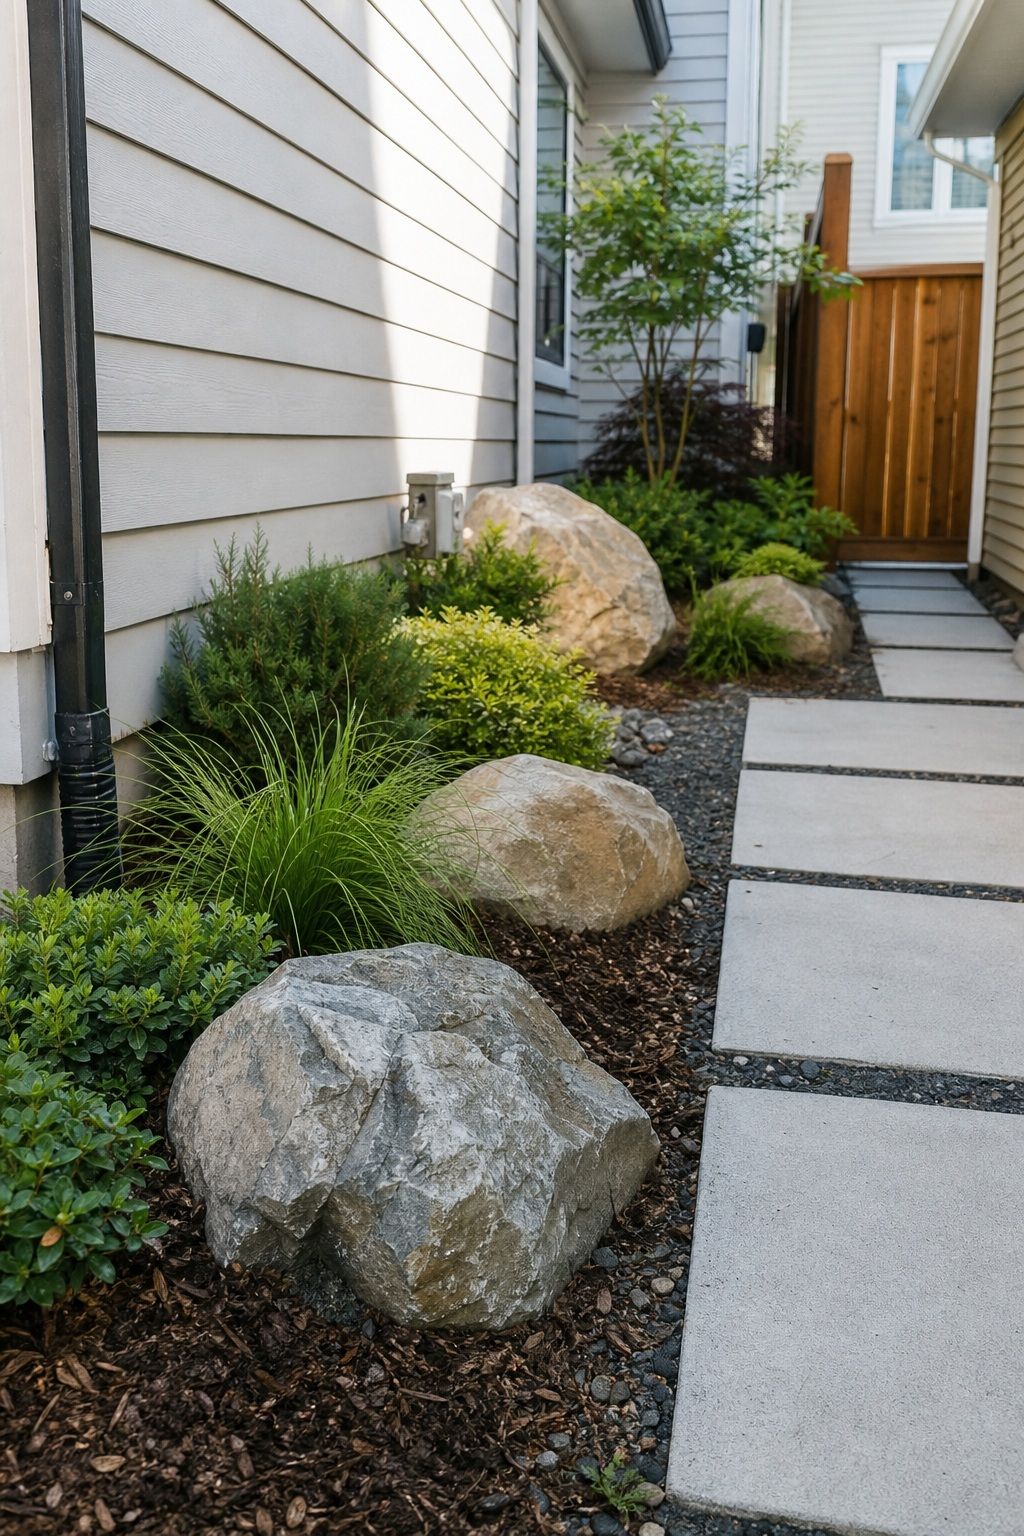
Rock size has to match the space or the whole thing falls apart. Big boulders overwhelm a small yard and make it feel smaller, while small stones get visually lost in a sweeping landscape and read as gravel rather than a feature.
In a compact yard or a patio corner, that means one modest anchor rock, maybe knee-height, rather than a true boulder, supported by mid-size stones. In a large open yard the anchors can be genuinely big. Match the rock to the room it lives in, the same way you would scale furniture, and the arrangement instantly looks intentional.
Read more: Halloween Centerpiece Ideas That Steal the Whole Table
4. Anchor the Spots the Eye Already Goes
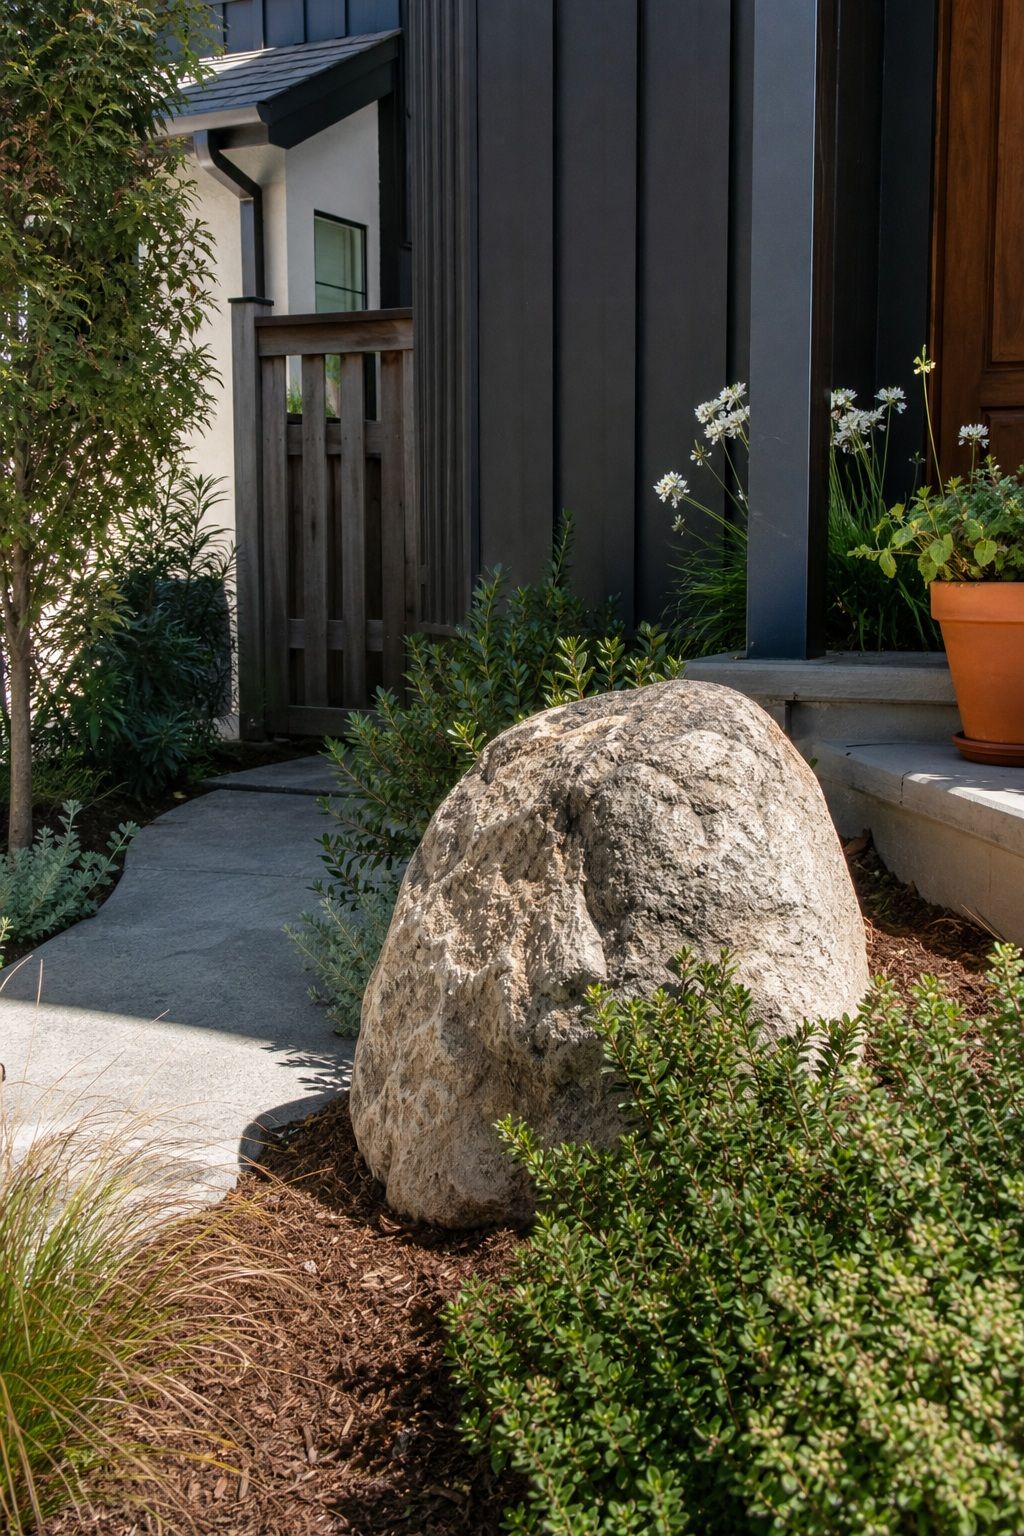
Anchor boulders earn their weight when they sit where attention naturally travels, a front entry, a path bend, a bed corner, the base of a slope. Put them there and the rock work feels like part of the landscape design rather than a pile that needed a home.
Avoid the dead center of an open lawn, where a single rock looks marooned. Edges, transitions, and corners are where stone reads as purposeful. The same logic of anchoring the spots the eye goes runs through our simple front yard landscaping ideas for the rest of the yard.
Read more: Top 20 Cozy Bedroom Ideas for Apartments That Actually Feel Like Home
Natural Rock Arrangements
5. Group Stones in Random Clusters
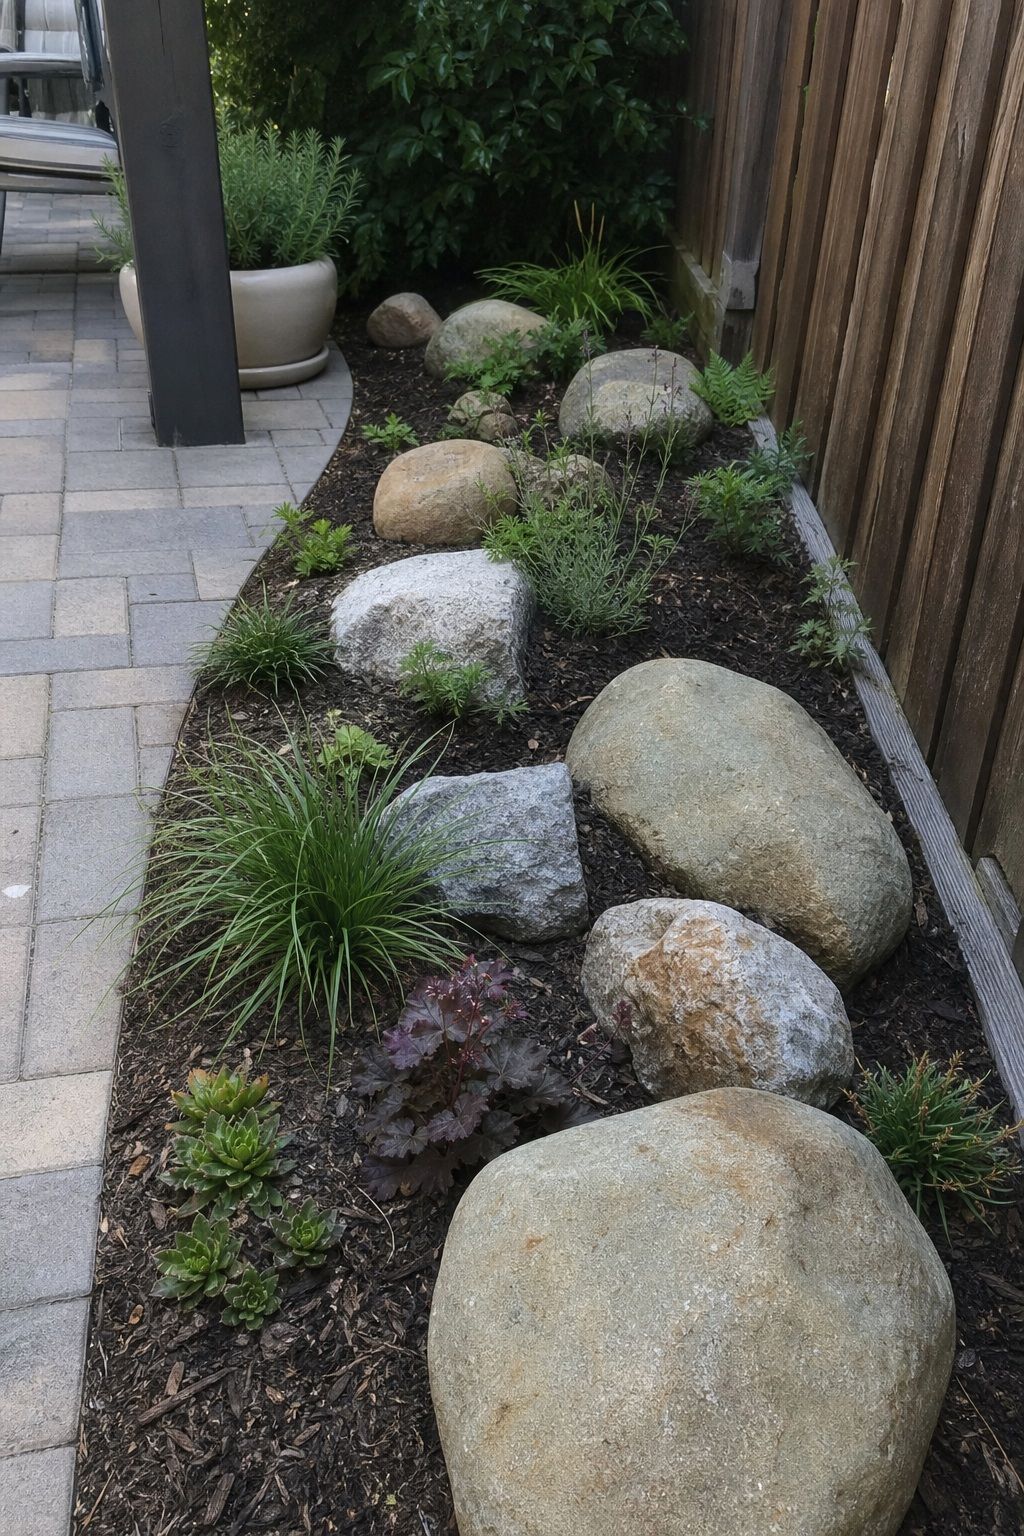


Nature does not space rocks evenly, and neither should you. Random groupings, two here, three there, one off on its own, look far more natural than stones placed at regular intervals like a fence. Even spacing is the single clearest tell of fake rock work.
Work in odd numbers, vary the gaps between clusters, and let some rocks nearly touch while others sit apart. Stand back often as you go, because the arrangement reads differently from a distance than it does up close. If a cluster looks deliberate, break it up until it looks like it simply happened.
Read more: Outdoor Entryway Ideas That Make Every Guest Stop and Stare
6. Vary the Size Within Every Cluster
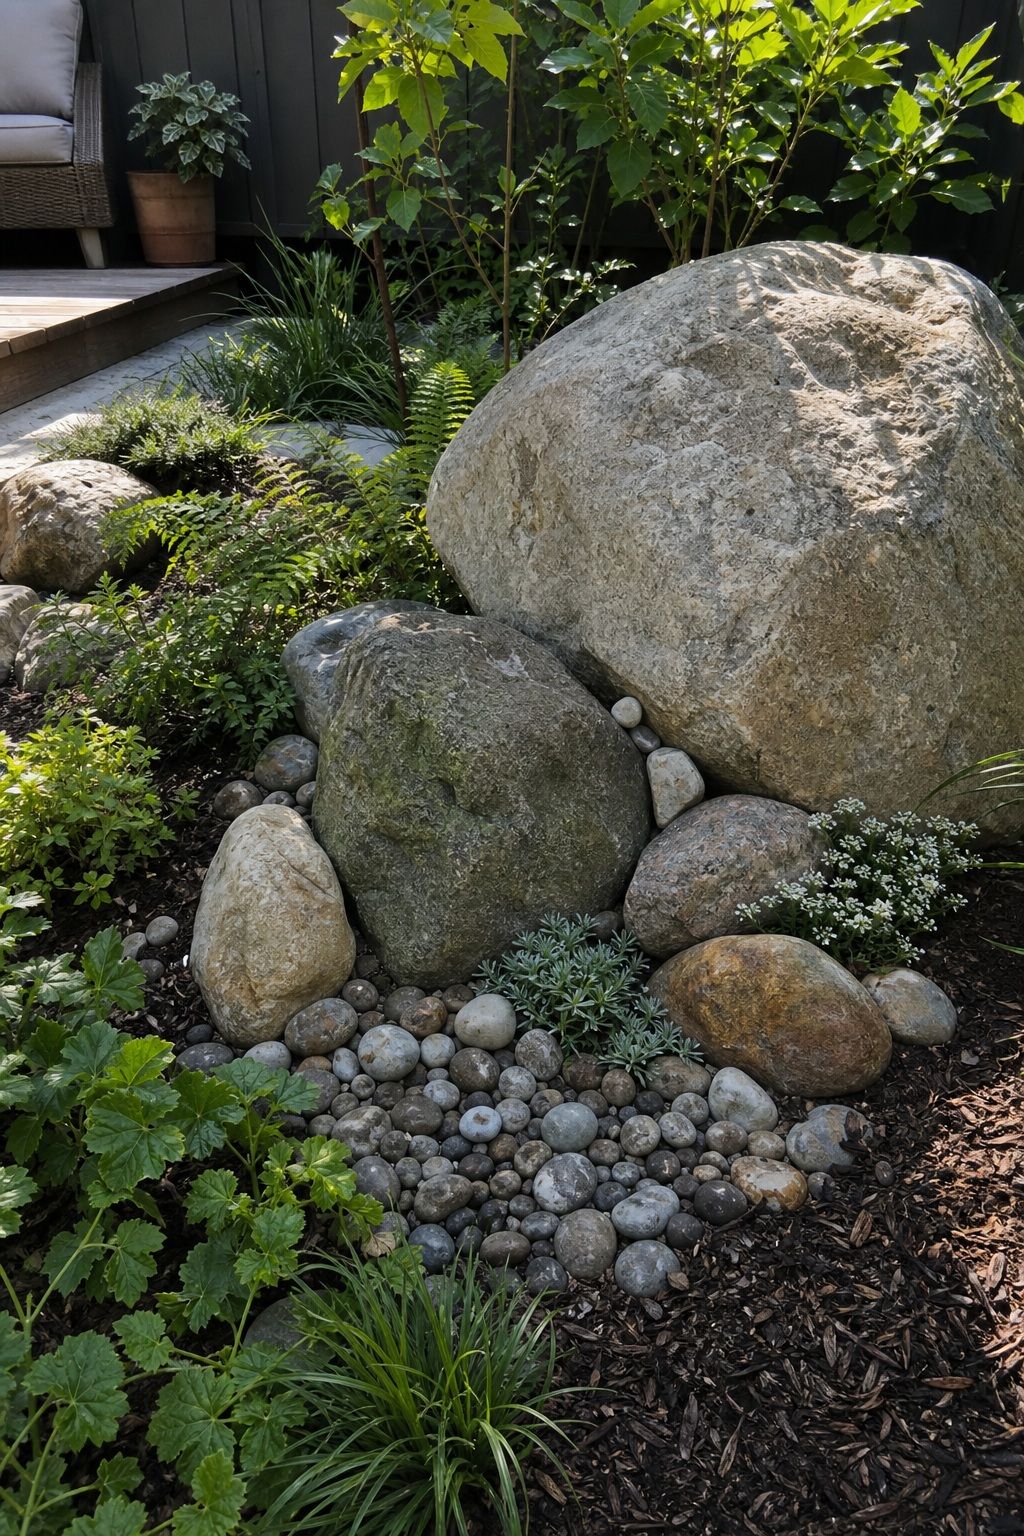


A cluster of same-size rocks looks like a product, not a formation. Every grouping should mix sizes, a larger stone, a couple of mid-size ones, a few small fragments at the base, the way real rock breaks down and settles over time.
Let the smaller pieces gather around and slightly under the larger ones, as though they eroded off. This size variation within each cluster is what gives the arrangement depth and keeps it from looking sorted. The goal is a formation that looks like it has been there for years, not delivered last week.
7. Build a Dry Creek Bed
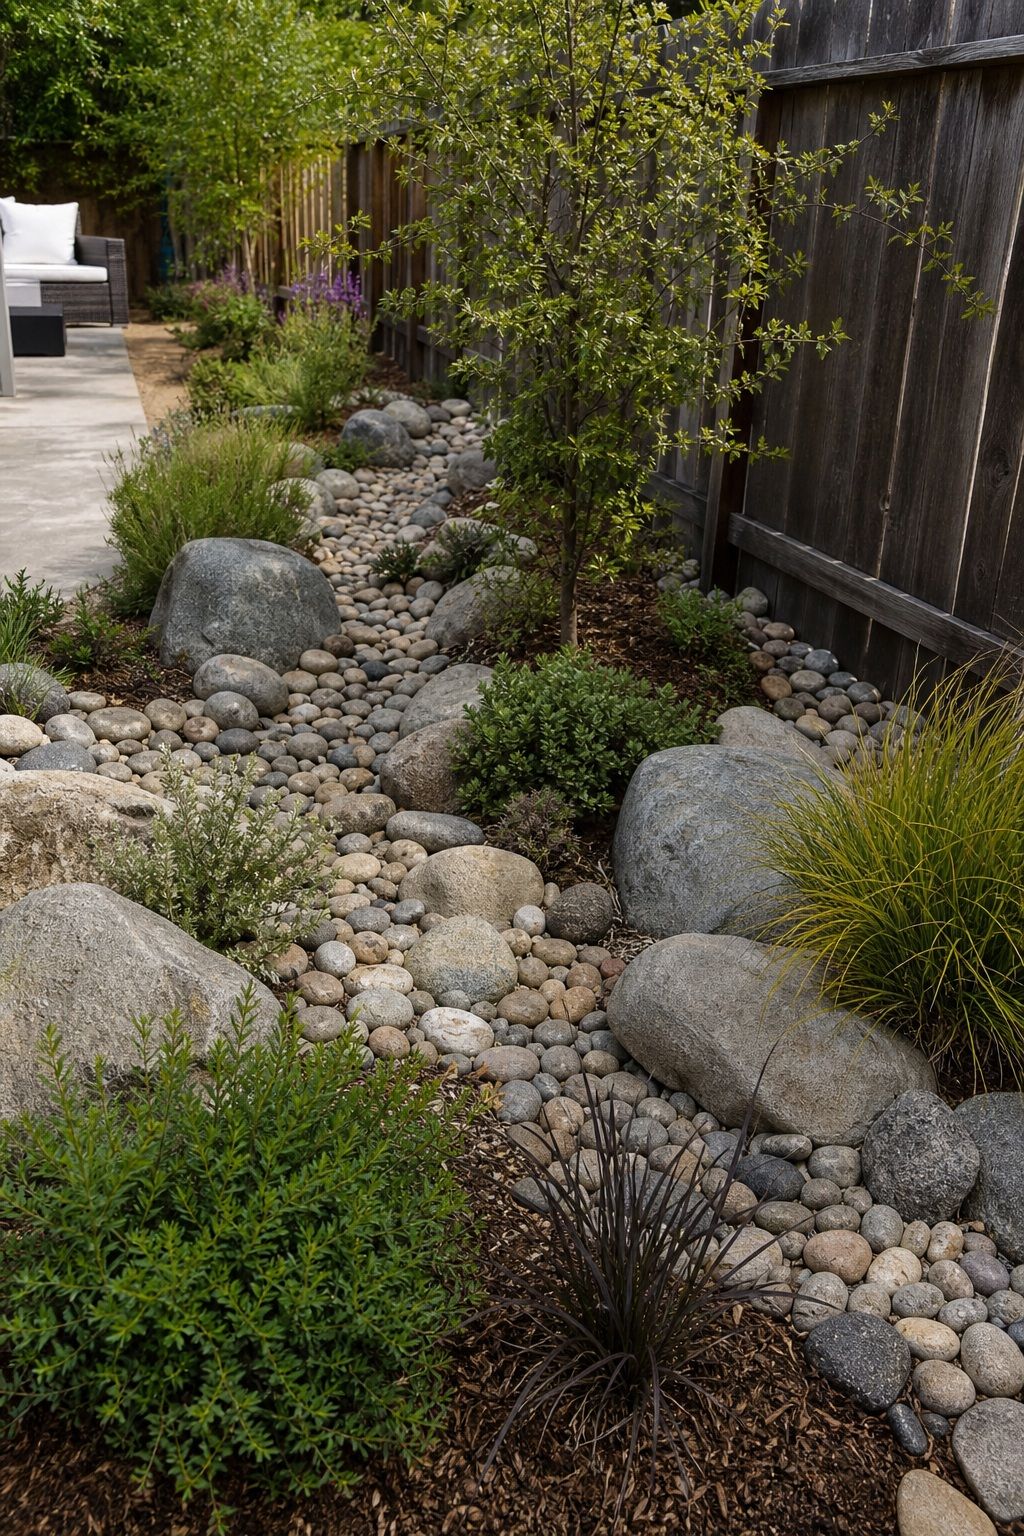
A dry creek bed is one of the most natural ways to use rock at scale, and it solves a drainage problem at the same time. Large river rock and boulders line the banks, smaller stones fill the channel, and the whole thing follows a gentle, curving path the way real water would.
Give it a slight slope away from your foundation so it actually moves water during heavy rain. Curve it, never straighten it, and vary the width as it runs. A dry creek bed reads as completely natural because it mimics something that genuinely occurs, which is exactly why it works.
Read more: Top 17 Natural Christmas Decor Ideas That Feel Handpicked and
8. Use Rock Steps on Slopes
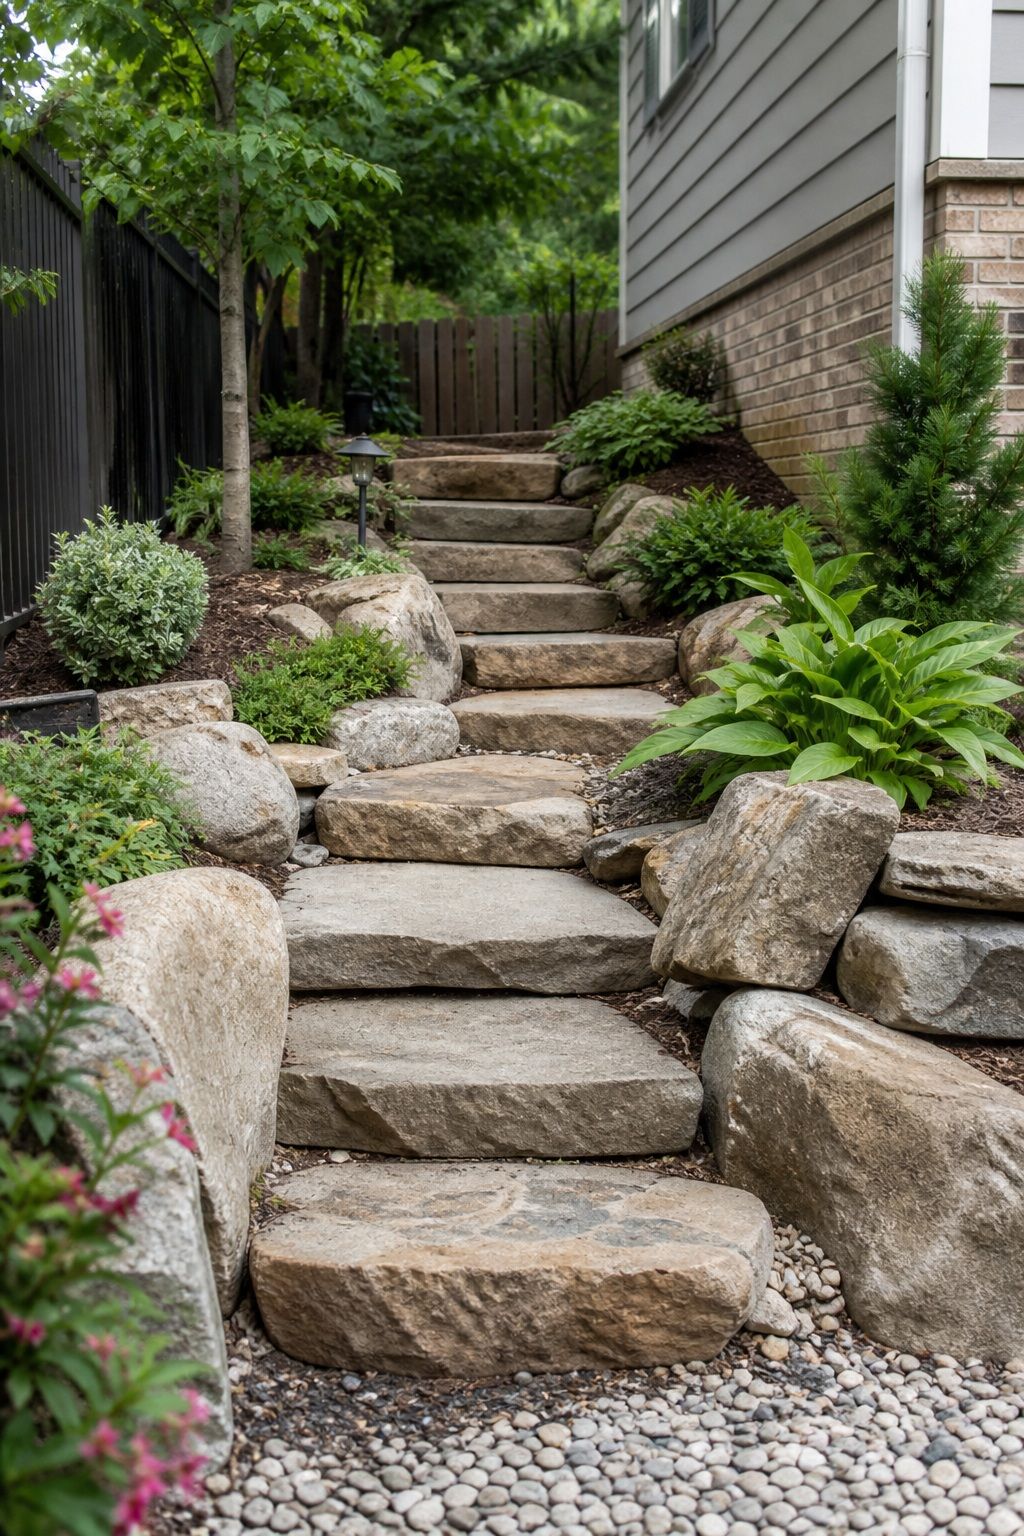


On any sloped or uneven ground, rock steps are an elegant, natural-looking solution that also happens to be long-lasting and low-maintenance. Wide, flat stones set into the grade create a footpath that looks like it was always part of the terrain.
Choose stones with naturally flat tops, set them firmly so none rock underfoot, and let the step spacing follow the slope rather than forcing a uniform rhythm. A little irregularity in the steps reads as natural, while perfectly even ones read as installed. The slight wander is the point, and it is exactly what makes a set of rock steps look like terrain rather than construction.
Read more: Top 20 Small Apartment with Kids Ideas: Organization & Decor
9. Edge Beds With Rock Instead of Plastic
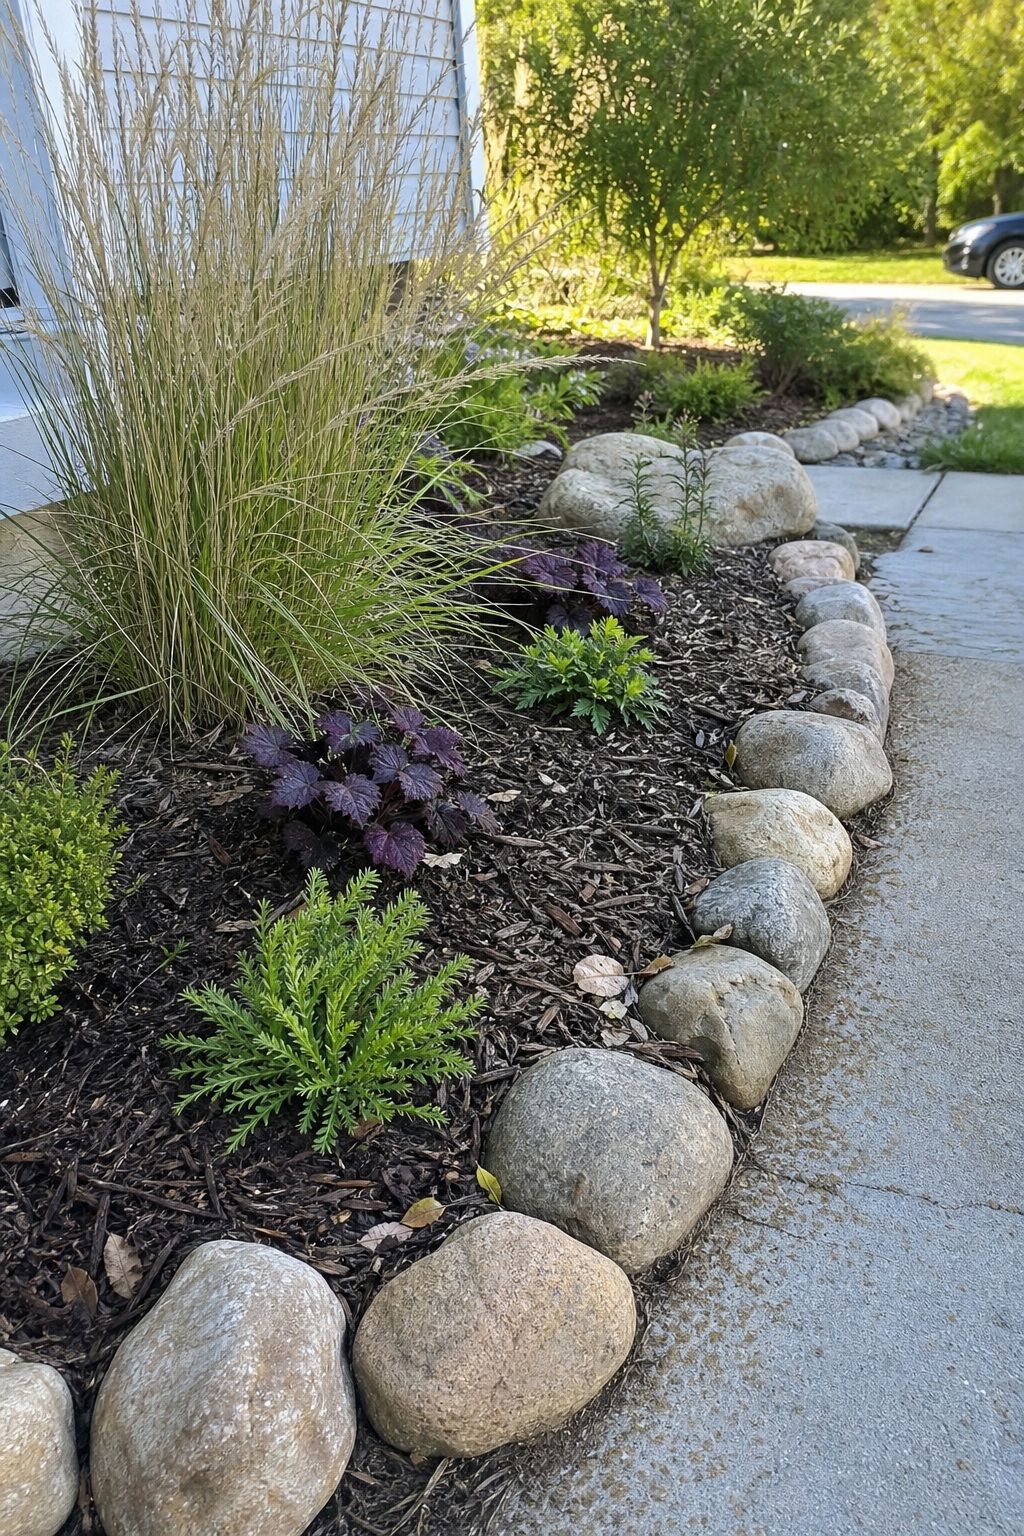


Rock makes a far more natural bed border than plastic or metal edging ever will. A loose run of stones separating lawn from planting bed gives a clean line without the hard, manufactured look of a strip of edging.
Keep the border slightly irregular, varying the stone size and letting the line wander a little, so it reads as a natural transition rather than a drawn boundary. Tuck a few plants over the edge to soften it further. Rock edging also holds up for decades, which plastic edging never does, so it pays for itself in time you do not spend replacing it.
Pair Rocks With Plants
10. Leave Planting Gaps Between Rocks
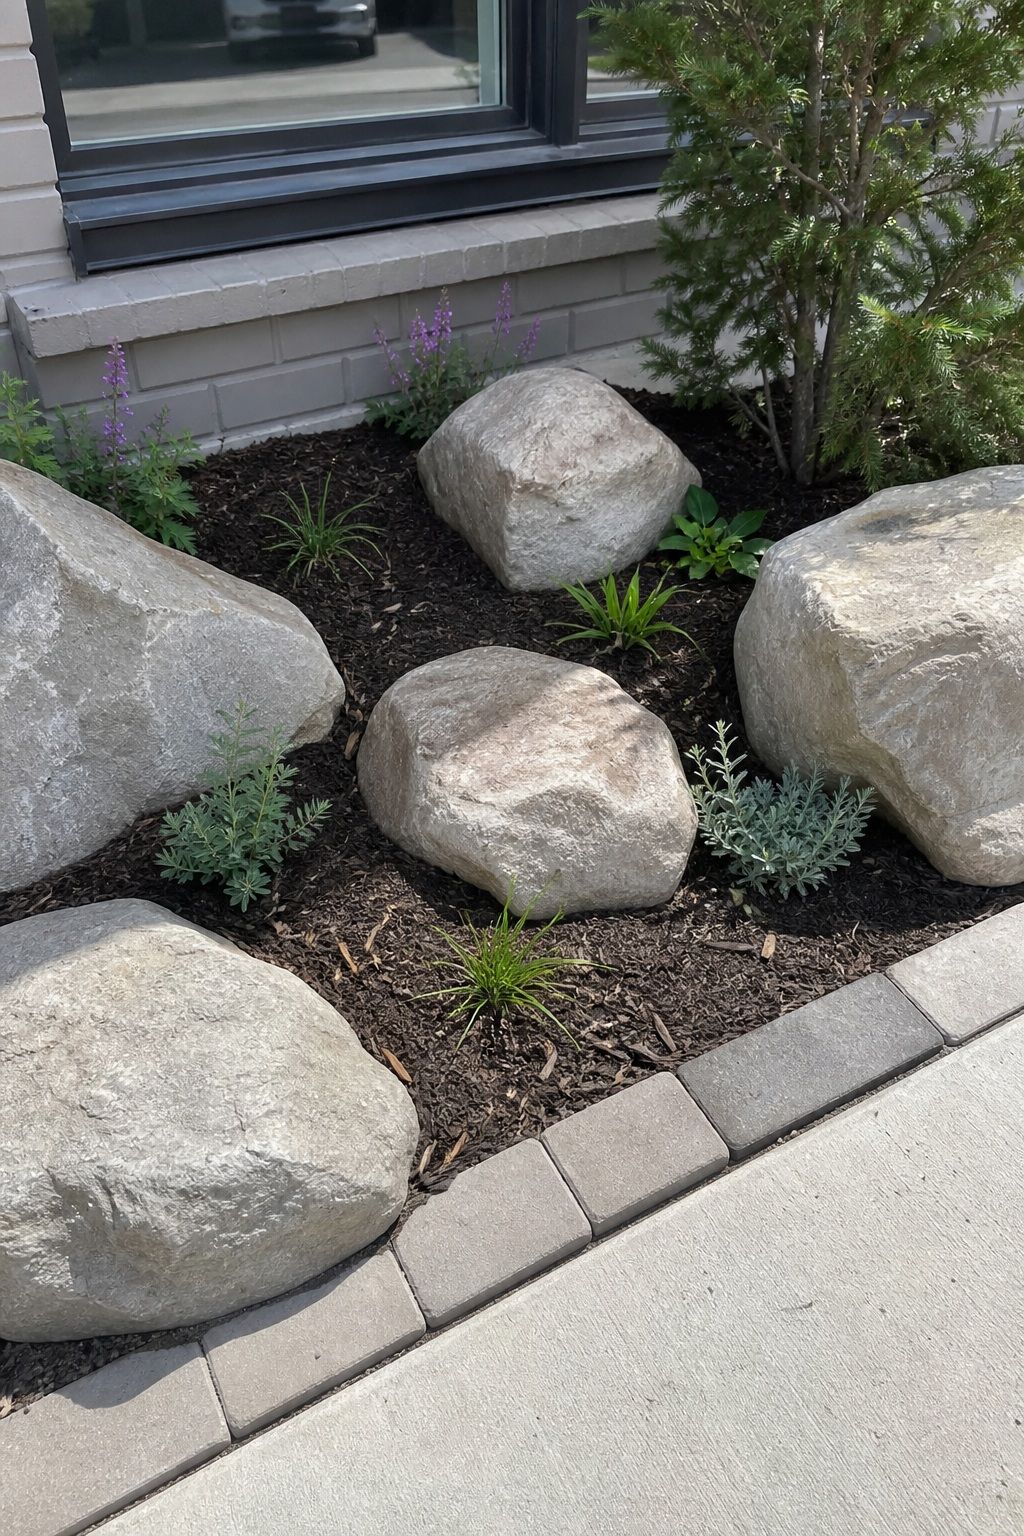


Rock with nothing growing through it just reads as hardscape, bare and a little unfinished. The greenery is what turns a pile of stone into a landscape. As you set the rocks, leave deliberate gaps and pockets of soil for planting, because adding them later is far harder than planning them in.
Plan the gaps before you finish placing the rock, not after, since it is far harder to add planting pockets once everything is set. The plants are not an afterthought here, they are half the design, and skipping them is the most common reason rock work looks unfinished. The same plant-and-hardscape balance carries our sunroom greenhouse ideas indoors.
Read more: Top 15 Small Balcony Garden Ideas to Maximize Your Outdoor Space
11. Choose Plants That Suit Rocky Ground
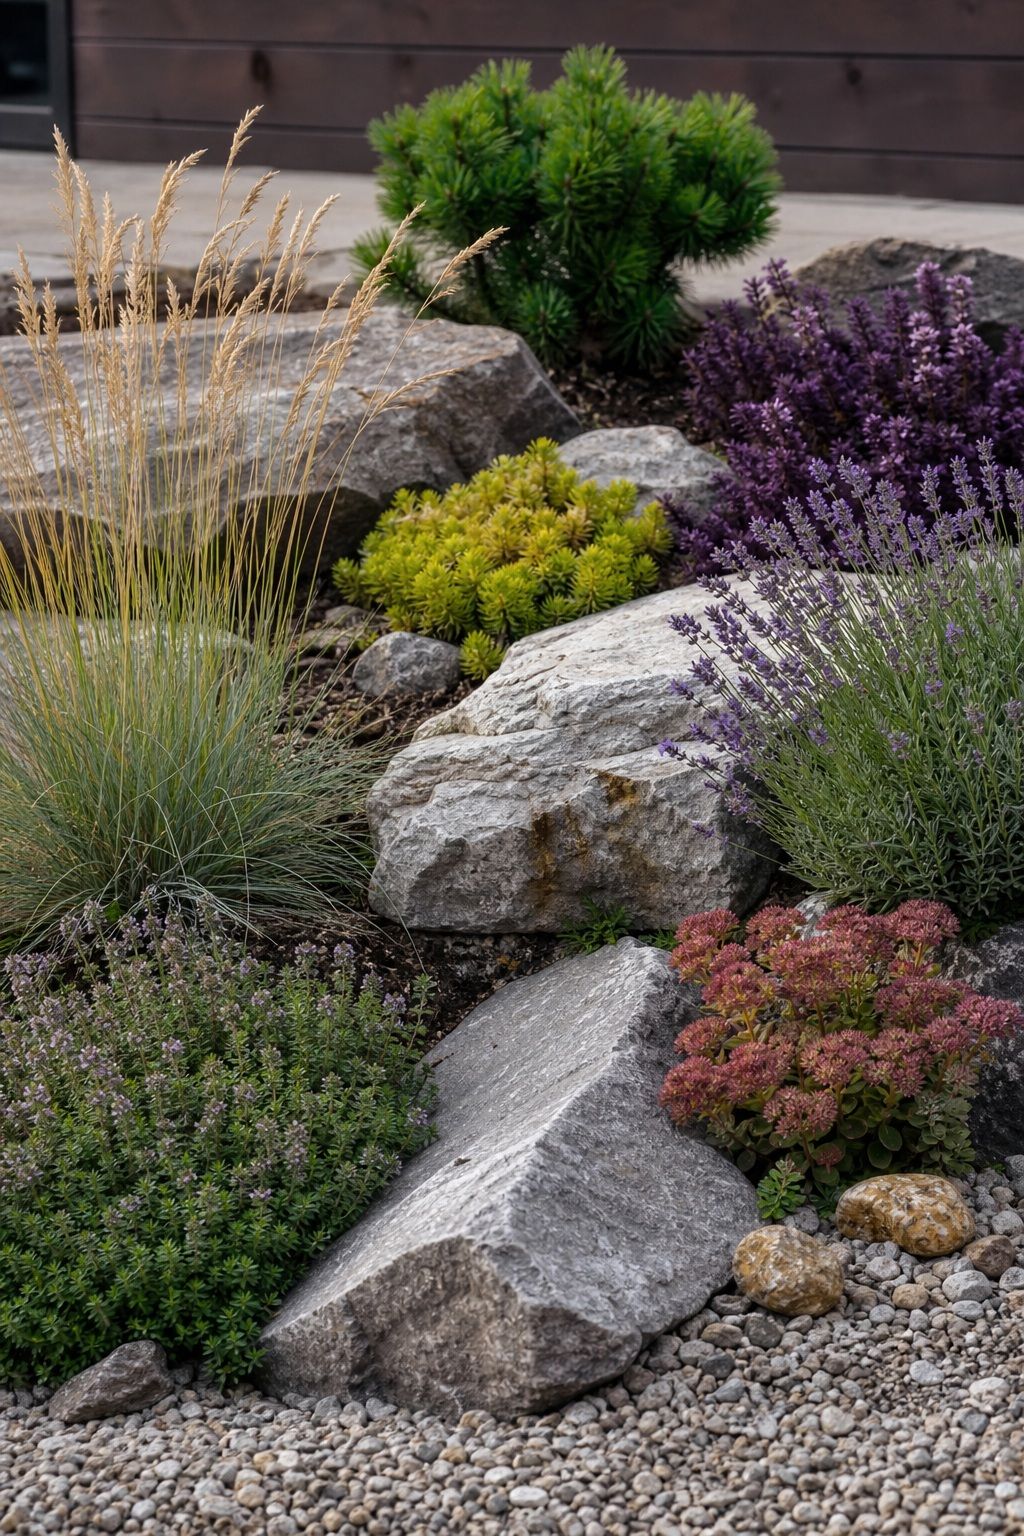
Some plants belong in rock and some fight it. Succulents like sedum and hens and chicks add texture and color and genuinely thrive in the lean, fast-draining soil between stones. Alpine plants like alpine aster and dwarf daffodils bring height and charm to a rock garden.
Match the planting to your light and climate, but lean toward low, spreading, drought-tolerant species that look at home among stone. These plants also need little water and little fuss, which suits a rock feature meant to be low-maintenance. For more on choosing plants that earn their spot, our guide to plants for a sunroom applies the same thinking.
Read more: Top 15 Front Porch Garden Ideas to Brighten Your Entryway
12. Let Plants Spill Over the Stone
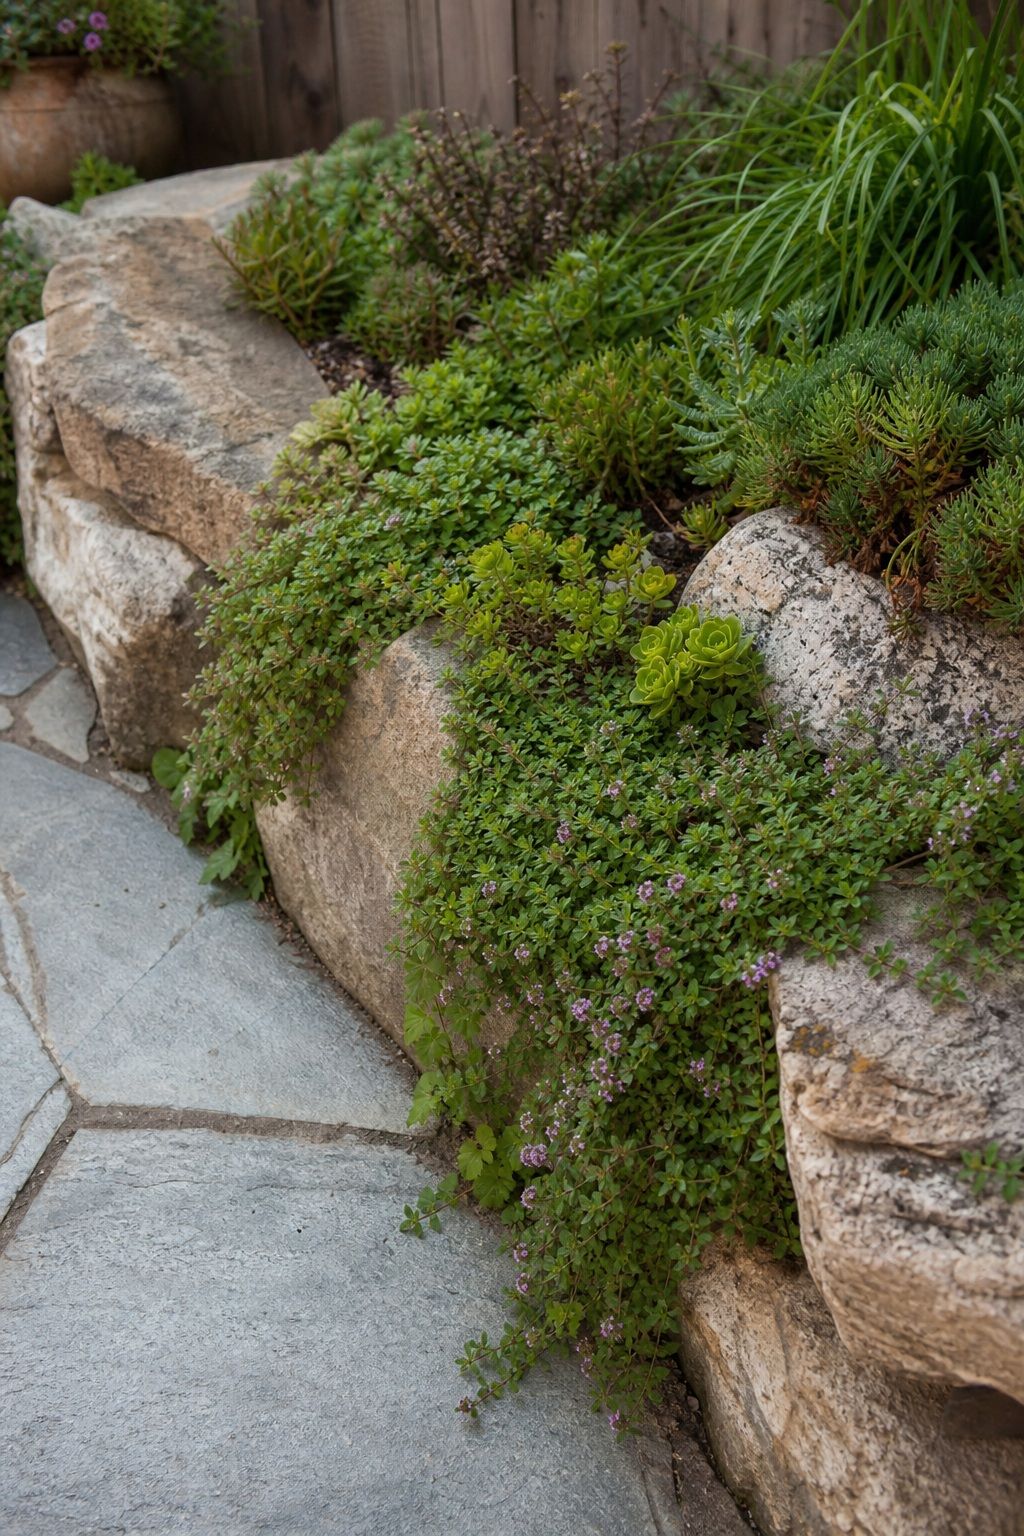


The most natural-looking rock plantings are the ones where the greenery is allowed to spill and trail over the edges of the stone rather than sitting in tidy clumps beside it. Creeping and trailing plants soften every hard edge and blur the line between rock and bed.
Plant them at the top edges of boulders and along the upper sides of clusters so they cascade down naturally over a season or two. A little overgrowth is exactly what makes rock work look established. Resist the urge to trim it all back into neat shapes.
13. Repeat a Few Plants for Cohesion
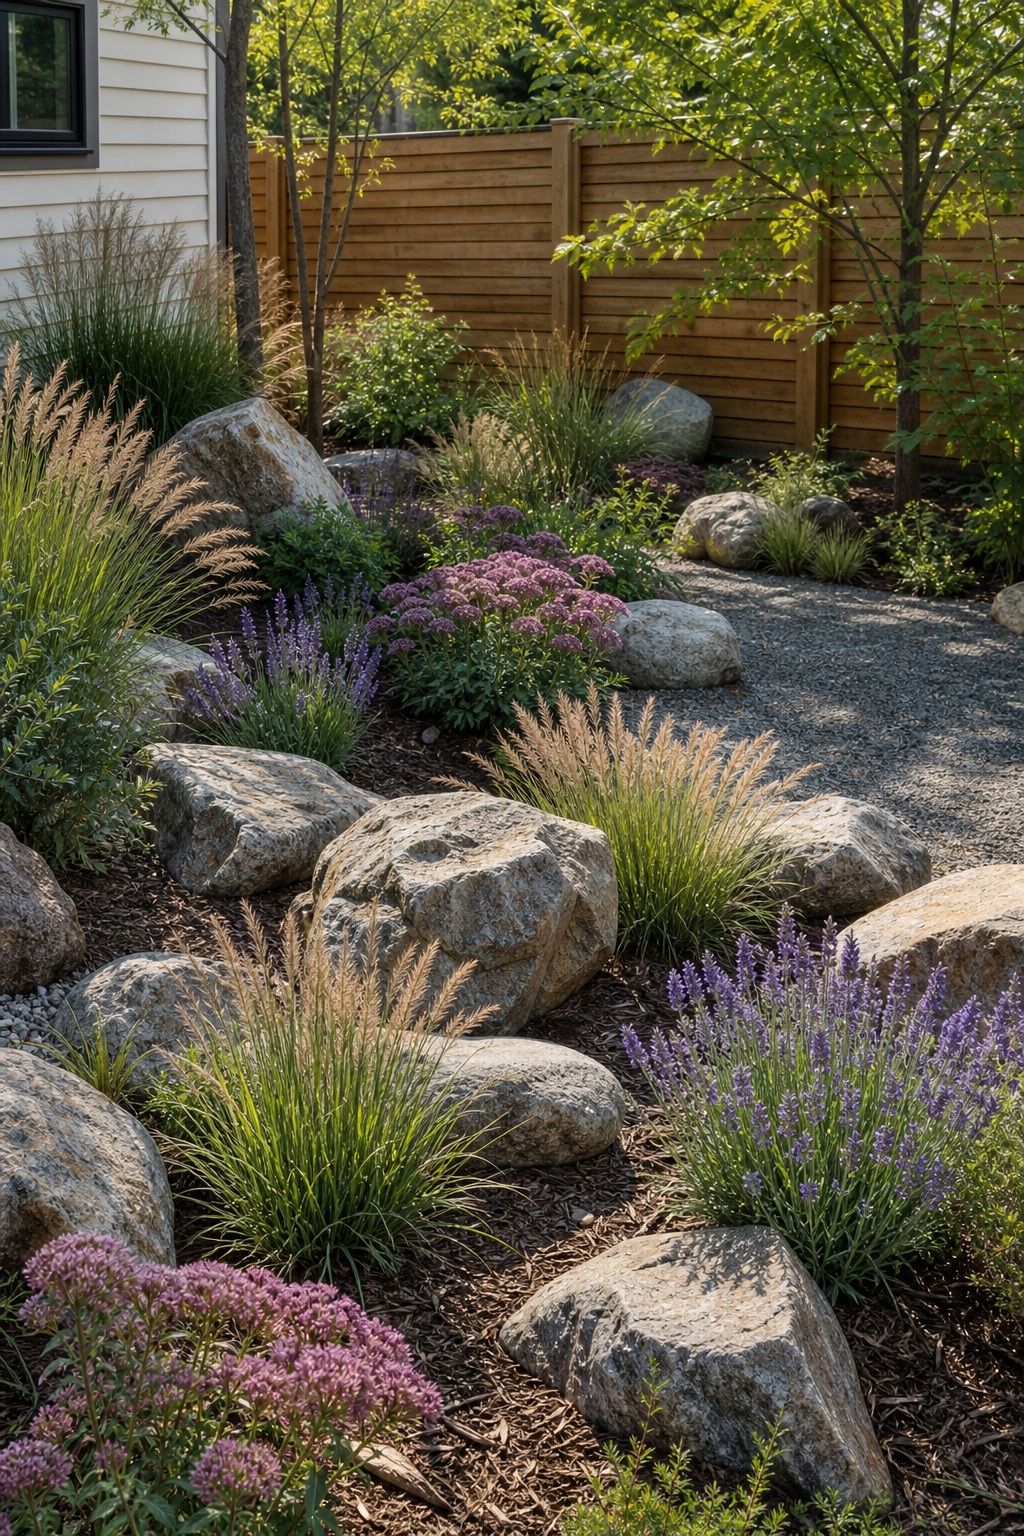


A rock garden with a different plant in every pocket looks scattered. Repeating just a few species across the whole arrangement is what ties it together and makes it read as one designed feature rather than a collection of leftovers.
Pick three or four plants that suit the conditions and use them again and again, varying the grouping but not the cast. Repetition does the same quiet work outdoors that it does inside a room. It is the cheapest way to make a planting look intentional, and it costs nothing but a little planning at the nursery.
Read more: Top 15 Small Outdoor Patio Ideas to Maximize Style and Comfort
Color, Texture, and Finishing
14. Choose Warm-Toned Stone for 2026
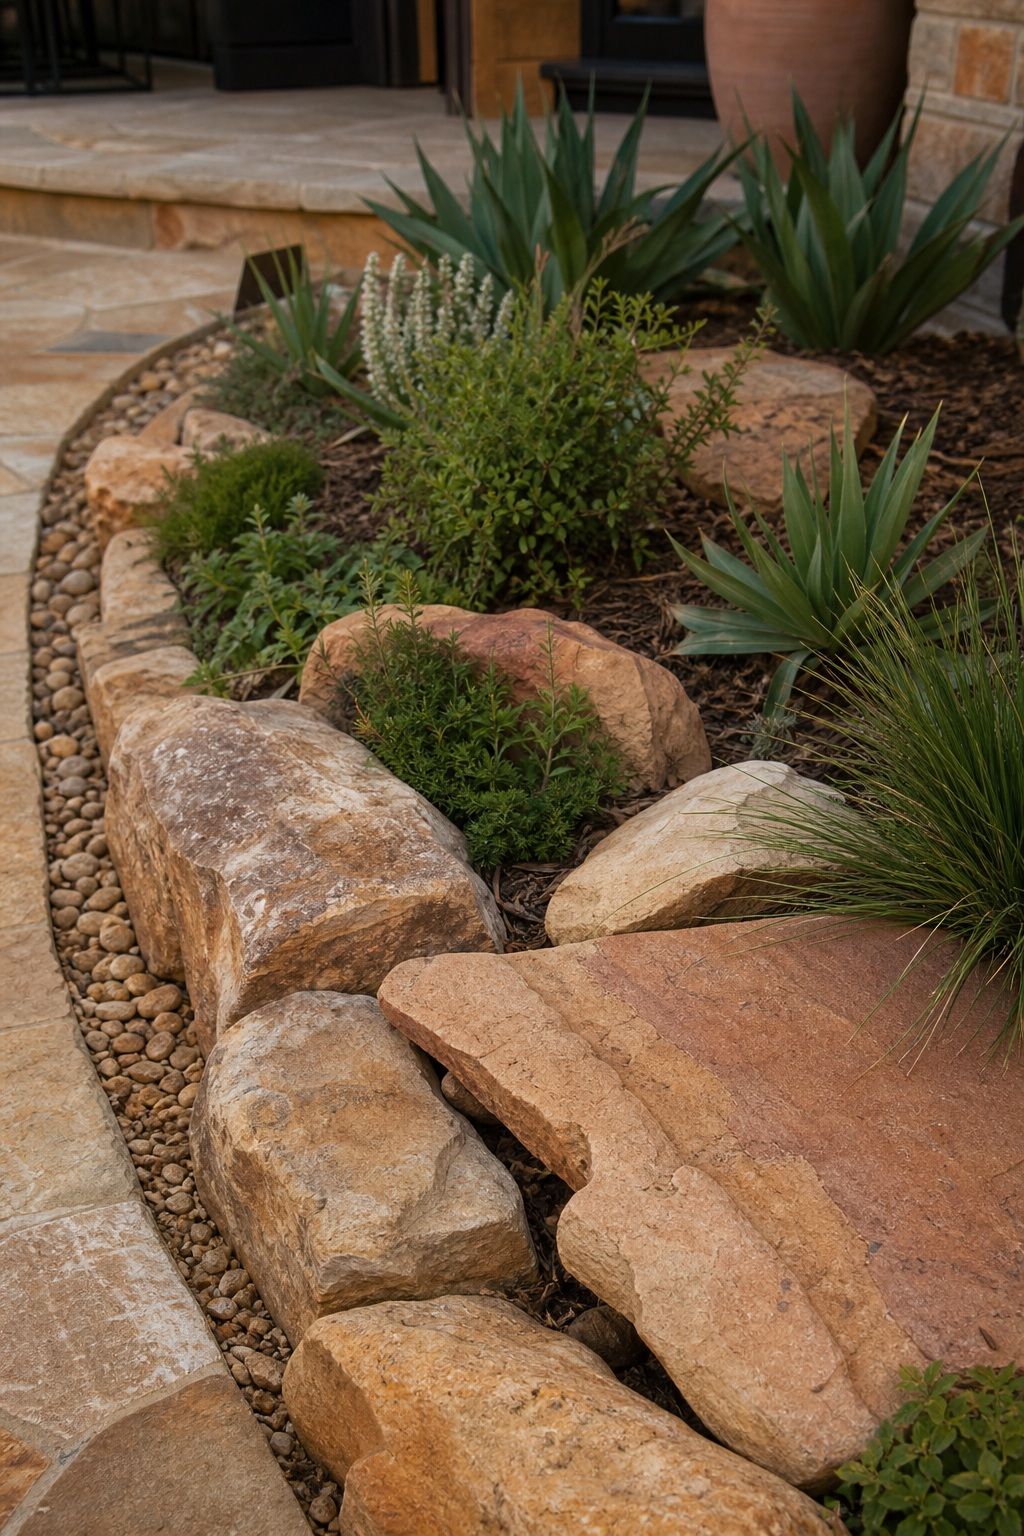
Classic blue-gray river rock will always exist, but 2026 has moved toward warm neutrals. Greige stones, sandy tan pebbles, and terracotta-tinted river rock make a yard feel more organic and sun-drenched, where cool gray can read as hard and a little industrial.
Pick a stone tone that works with your house and hardscape rather than fighting it, warm stone beside warm brick, cooler stone beside gray siding. Whatever you choose, keep it consistent across the whole yard so the rock work reads as one material. A mix of stone colors is another quiet tell of an arrangement that was bought in stages.
Read more: Top 15 Covered Outdoor Patio Ideas to Maximize Your Backyard
15. Mix Rough and Smooth for Texture
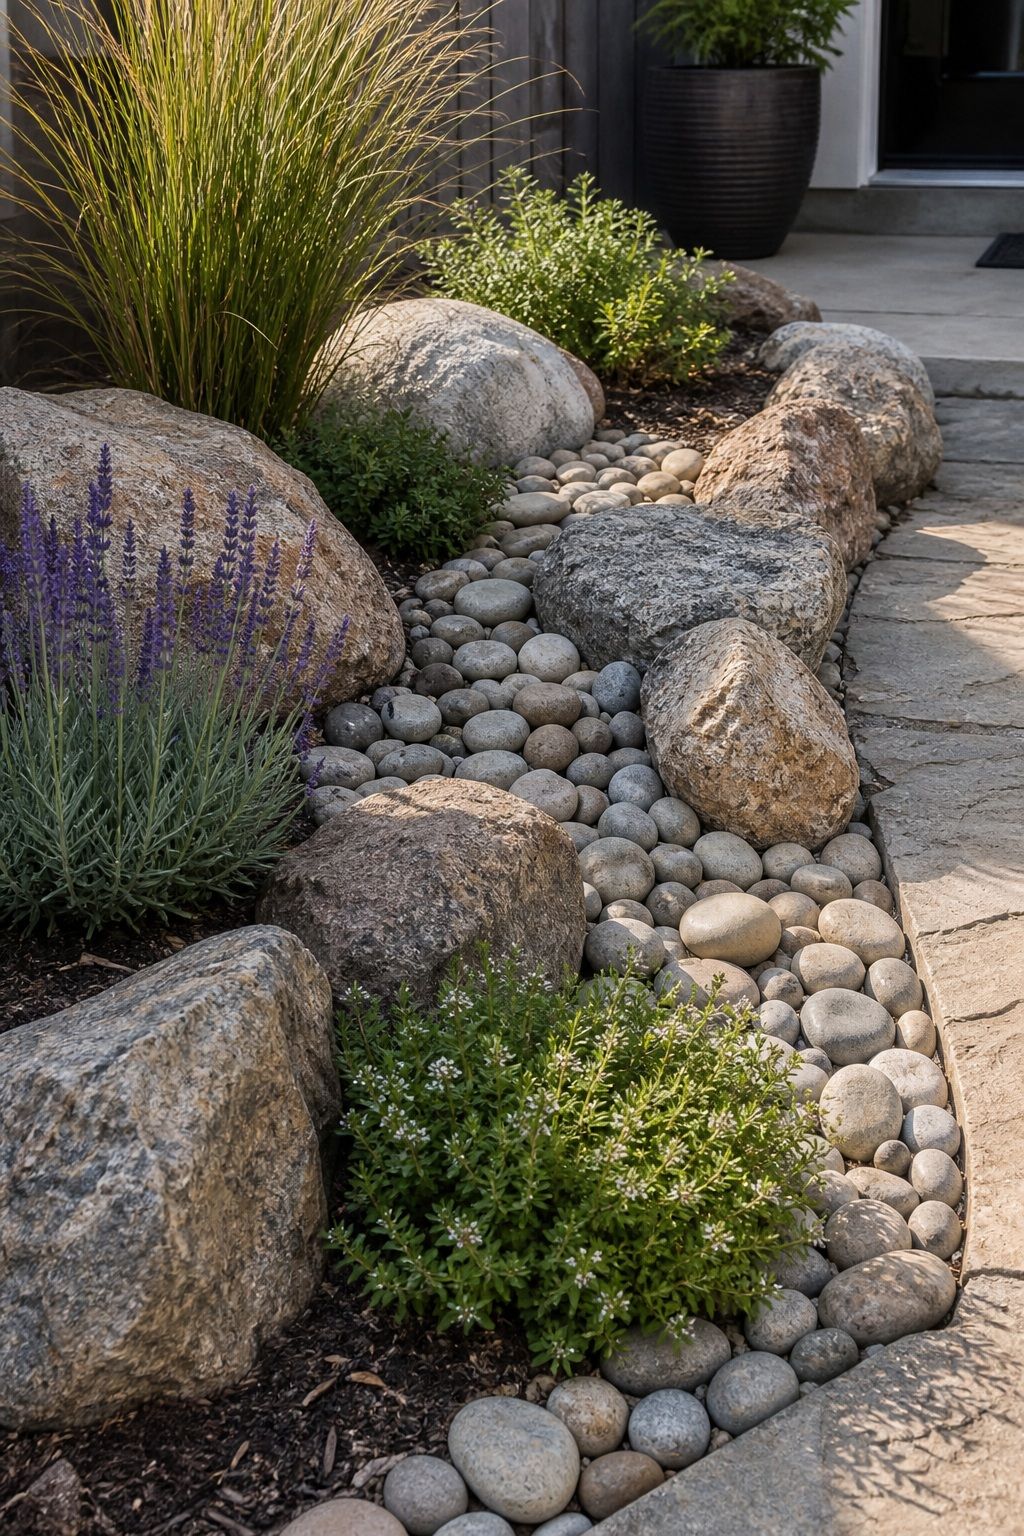
Texture is part of how rock reads, not just color. Rough, irregular rocks add rugged, natural appeal, while smooth pebbles and clean gravel lend a more formal, finished look. Most natural-looking arrangements lean rough, with smooth stone used sparingly.
If you want the relaxed, organic look, weight the arrangement toward rough and irregular stone and let smooth pebbles fill only the channels or low spots. Matching the texture to the mood you want, rugged or formal, is as important as matching the size to the space. Pick a direction and commit to it, because a half-rough, half-smooth mix reads as undecided.
Read more: Top 15 Boho Outdoor Patio Ideas for a Cozy, Colorful Retreat
16. Lay Fabric Under High-Traffic Rock
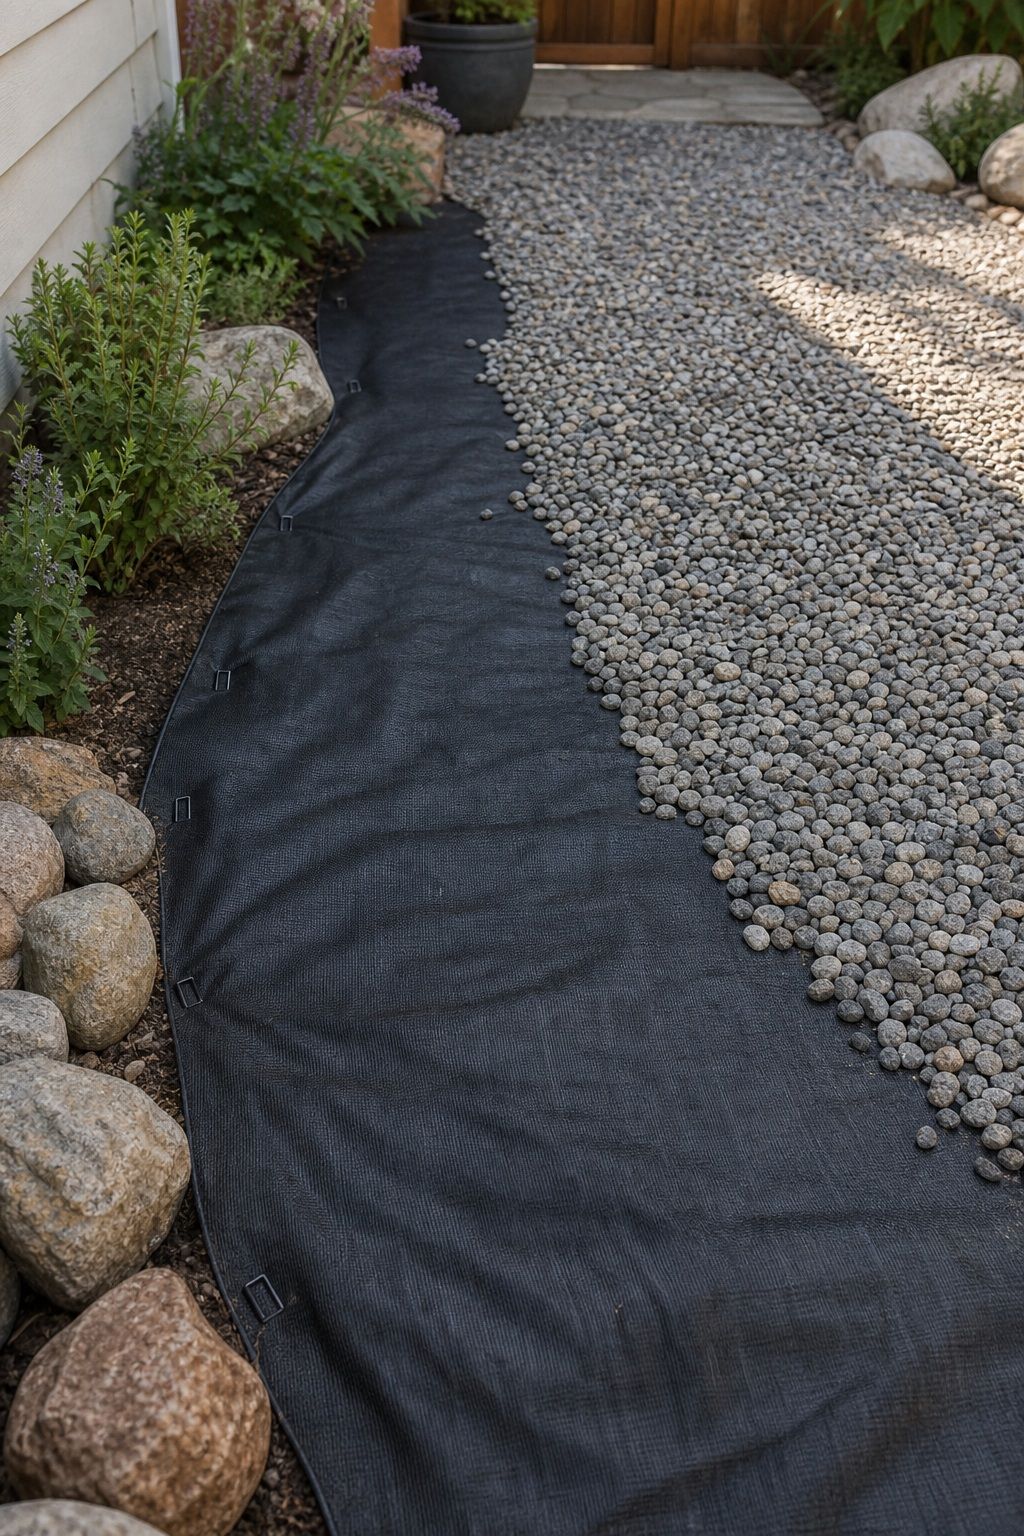


For dry creek beds, gravel channels, and rock paths, a layer of heavy landscape fabric underneath keeps weeds from growing up through the stone and keeps the rock from sinking into the soil over time. It is the unglamorous step that keeps the feature looking good for years.
Skip the fabric under planting pockets, where you actually want roots reaching soil, but use it everywhere the rock is purely decorative or structural. A natural look that survives more than one season is worth the extra hour of prep. This is the maintenance reality most rock guides leave out, the same practical-first thinking behind our small apartment patio ideas on a budget.
17. Step Back and Edit the Whole Yard
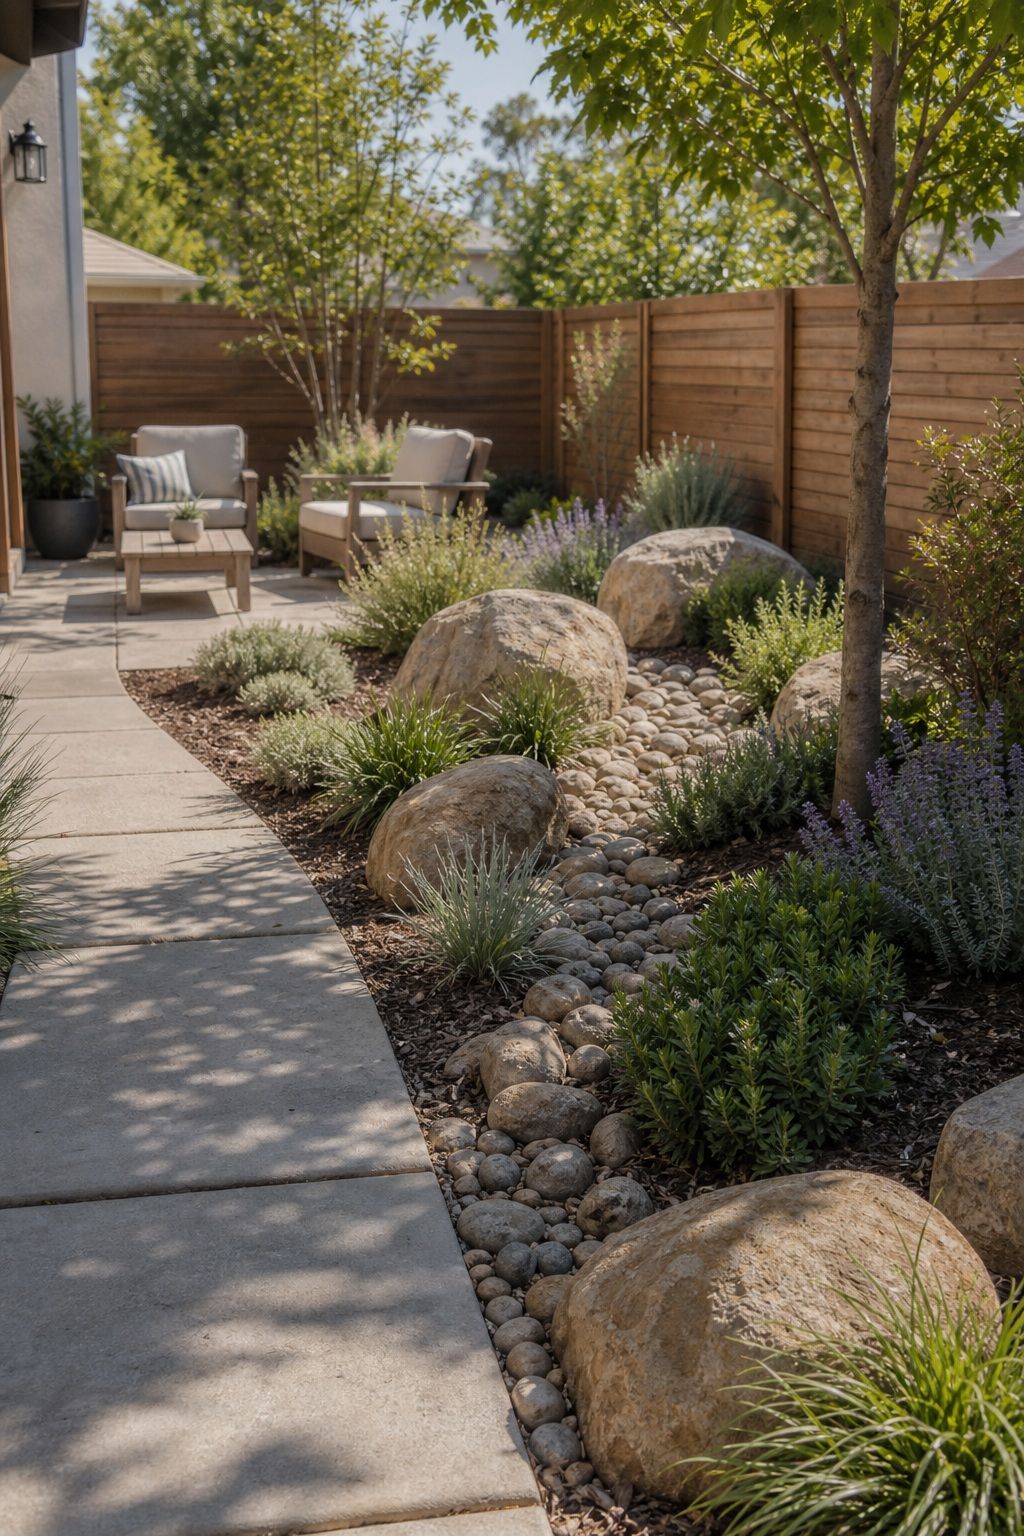


The final step is the one that separates natural rock work from obvious rock work, the edit. Walk the yard from a distance and from the angles people actually see it, and look for anything too even, too sorted, too centered, or too bare.
Pull a rock that sits too perfectly, break up a cluster that looks deliberate, add a plant to a pocket that reads empty. Natural-looking landscaping with large rocks is mostly a series of small corrections toward looser, more random, more planted. Done well, it should look like you barely did anything at all, which is the whole point.
Read more: Top 17 Winter Porch Decor Ideas for January and February
Ready to bring that same natural, considered feel to every room of your home?
The Aesthetic Apartment Makeover Guide gives you a clear, room-by-room plan with real product picks and budget ranges. Grab it now for just $17, the price goes up to $27 soon.
Landscaping With Large Rocks FAQ
How do you landscape with large rocks naturally?
Place the largest anchor boulders first and bury each one a quarter to a third deep so it looks like it grew there. Group the rest in random clusters with varied sizes, never even rows, and leave planting gaps so greenery grows through. Warm-toned stone reads more natural than blue-gray.
How do you arrange large rocks in a garden?
Set one or two large anchors where the eye naturally goes, then build random, odd-numbered clusters around them with mixed stone sizes in each group. Vary the gaps between clusters, angle the rocks the way exposed stone tilts in nature, and stand back often to check it does not look sorted.
What size rocks look best for landscaping?
Match the rock to the space. Big boulders overwhelm a small yard and small stones get lost in a large one. A compact yard or patio corner wants one modest knee-height anchor with mid-size support stones, while a large open yard can carry genuinely big boulders.
How do you make a rock garden not look fake?
The fake look comes from tidiness. Bury rocks partway, group them in random clusters with varied sizes, avoid even spacing and dead-center placement, leave planting pockets, and let plants spill over the stone. Then edit, pulling anything that looks too even or too deliberate.
What is the best rock color for landscaping in 2026?
Warm neutrals are leading 2026. Greige stones, sandy tan pebbles, and terracotta-tinted river rock make a yard feel organic and sun-drenched, where classic blue-gray can read hard and industrial. Pick a tone that suits your house and keep it consistent across the whole yard.
Key Takeaways
- Set the largest anchor boulders first and bury each one a quarter to a third deep so the rock looks like it grew there rather than getting placed.
- Group stones in random, odd-numbered clusters with varied sizes, never even rows, since even spacing is the clearest tell of fake rock work.
- Leave planting gaps and pair the rock with low, drought-tolerant plants that spill over the edges, so it reads as a landscape rather than hardscape.
- Choose warm-toned stone, greige, sandy tan, terracotta river rock, over classic blue-gray for a more organic, sun-drenched 2026 look.
- Lay landscape fabric under purely decorative rock, then step back and edit the whole yard, pulling anything too even, too sorted, or too bare.
Final Thoughts
Landscaping with large rocks that actually looks natural is less about the rocks and more about the restraint. Anchor with the big stones, group everything loosely and randomly, plant into the gaps, choose warm stone, and finish with a hard edit. Nature is irregular, settled, and a little overgrown, and the closer your arrangement gets to that, the less it looks like landscaping at all. That quiet, did-you-even-do-anything result is exactly what you are after.
Last update on 2026-09-15 / Affiliate links / Images from Amazon Product Advertising API
